Practice: Building a website with SEO in mind
Why do digital marketing beginners need to build and own their websites?
We have learned the basics of digital marketing and a website. Now we will learn about other digital tools that can work with a website. Before we move on to the next parts, let’s learn and build your website first that will work as the hub for your digital marketing tools.
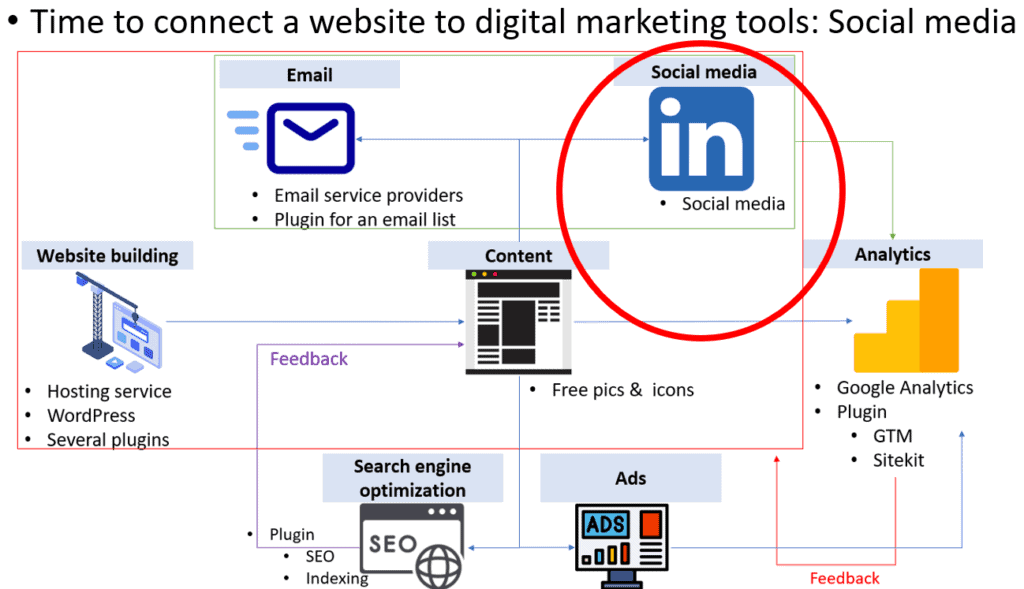
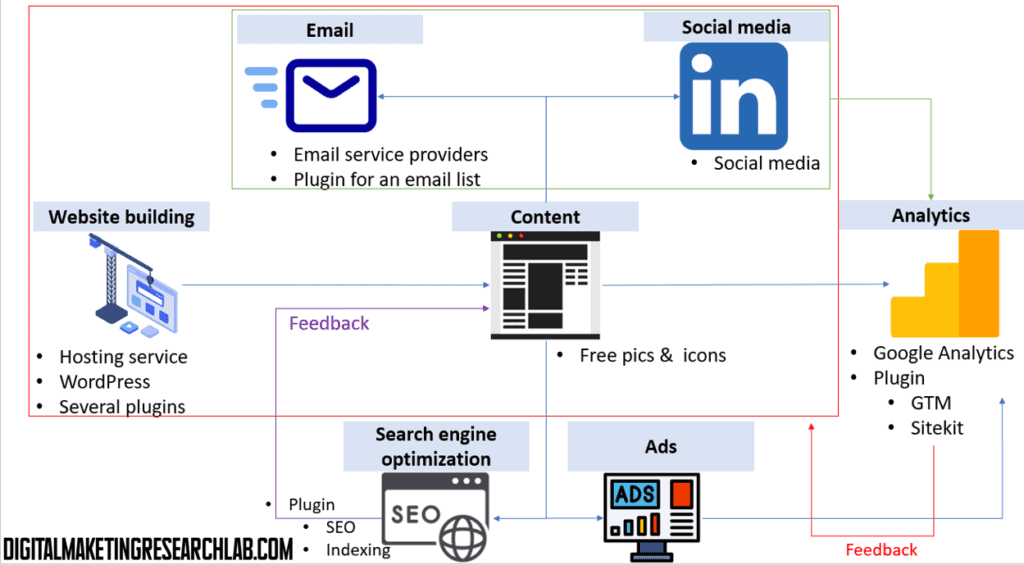
As this website is designed to help college students and beginners to understand and utilize digital marketing, we may have a question: Why do digital marketing beginners need to build and own their websites? The first appropriate answer might be that ‘without the experience of connecting your website with other digital marketing elements, it’s hard to grasp a big frame of digital marketing.’ If you have read some digitial marketing text book, can you picture the relations among digital marketing tools without the figure below? Fragmented chapters without clear connections in many textbooks simply frustrate beginners.
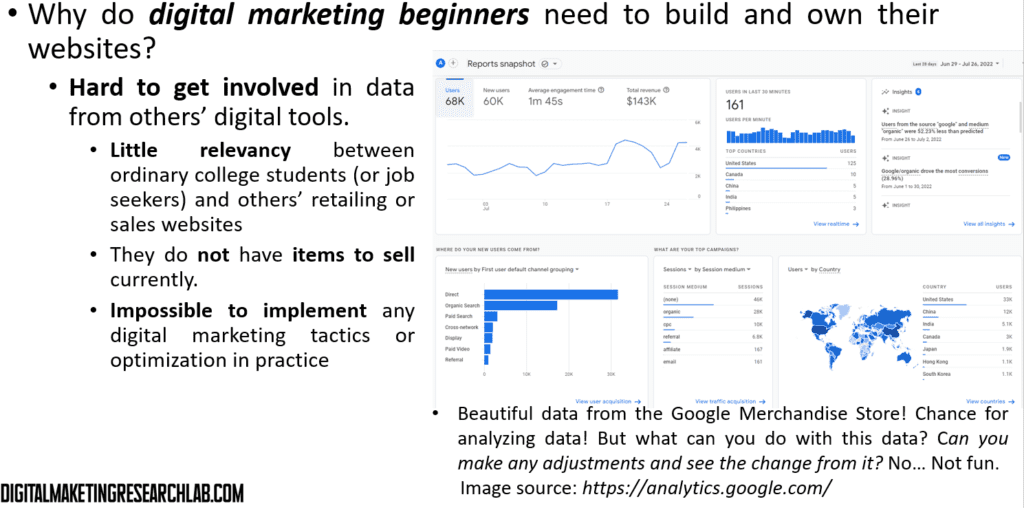
The second answer might be that ‘it is hard to get involved in data from others’ digital tools’. The dataset is not from the digital marketing from learners but from the industry, so there is little relevance between ordinary college students (or job seekers) and others’ retailing websites. Many entry-level digital marketing learners do not have items to sell currently. So those learners can’t implement any digital marketing tactics or optimization with the external dataset in practice.
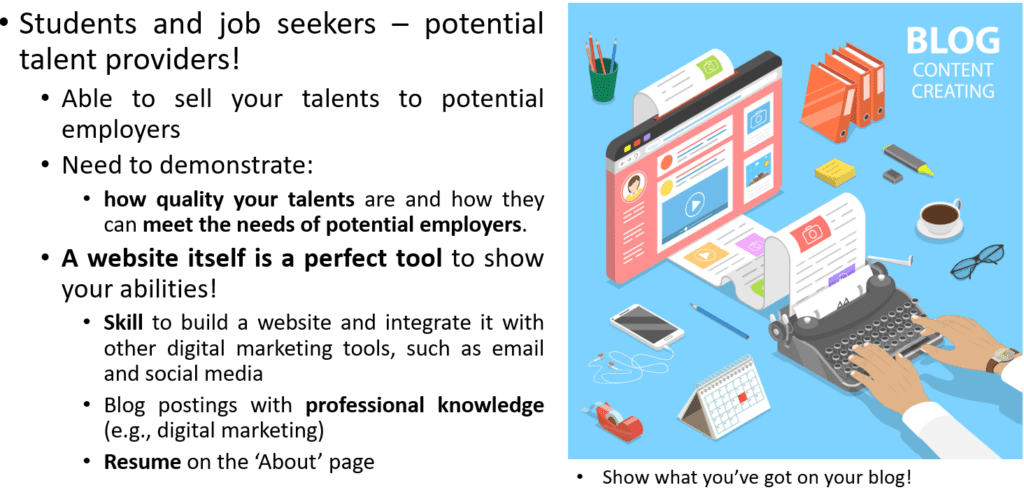
If you are college students or job seekers, you may not any products and services currently. However, you are potential talent providers! So, you can sell your talents to potential employers soon. To be successful in the job market, you need to demonstrate how quality your talents are and how you can meet the needs of potential employers.
In this sense, a website itself is a perfect tool to show your abilities! It can prove your skill to build a website and integrate it with other digital marketing tools, such as email and social media. Blog postings with professional knowledge (e.g., digital marketing) demonstrate that you have the right knowledge for the job your want to land. Your resume on the ‘About’ page publicizes 24/7 how you are well qualified for the job
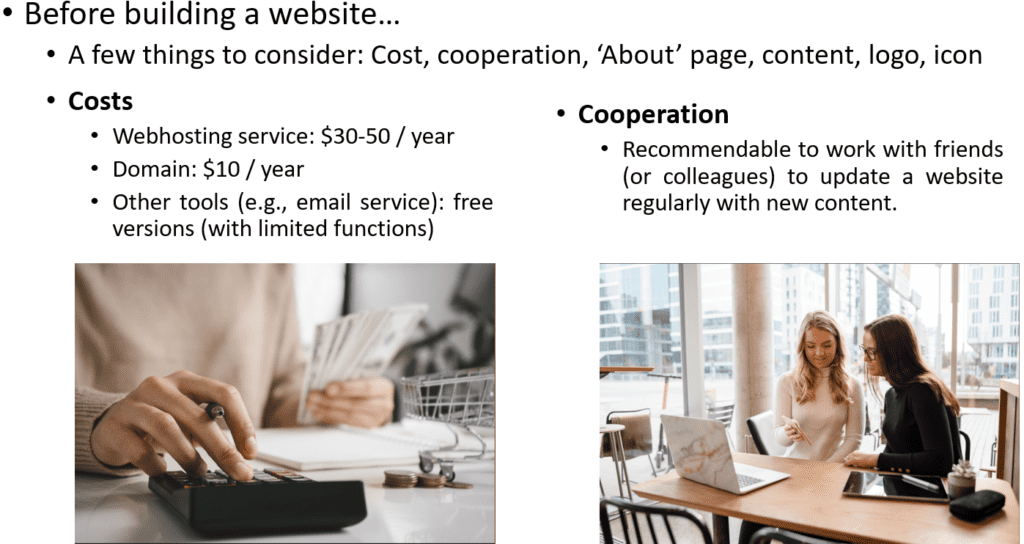
Before building your webpage, there are a few things to consider: Cost, cooperation, ‘About’ page, content, logo, icon, and so on.
Building a website takes some money to purchase services such as a webhosting service ($30-50 / year) and a domain service ($10 / year). However, except for that, you can take advantage of other tools (e.g., email service) or free versions of plugins
Managing a website or a blog needs consistency, such as regular updates, but this is not such an easy job. So, it is recommendable to work with friends (or colleagues) to update a website regularly with new content.
What to prepare before building a website?
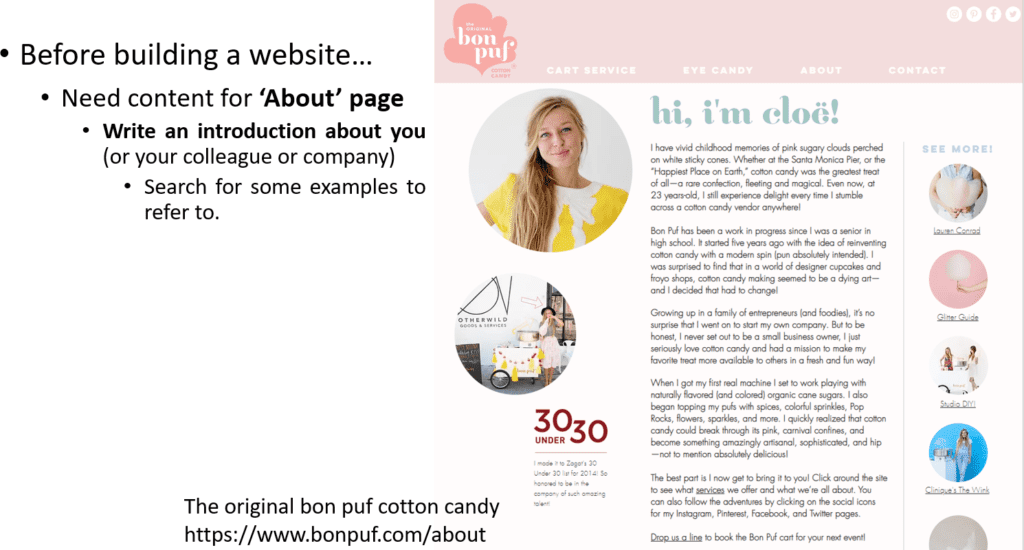
Next, you will think of content that you will put on your website.
Think of content for ‘About’ page and write an introduction about you (or your colleague or company). You may search for some examples to refer to.
Then, think of the major content on the website. If you are a job seeker, the potential content may include professional knowledge such as digital marketing, social media, content creation, and so on. You can also upload stories about your personal achievement or experience such as awards, community service, internship, and so on. If you have some companies that you want to join, upload related news such as marketing activities from companies. But never forget consistency is the key!!

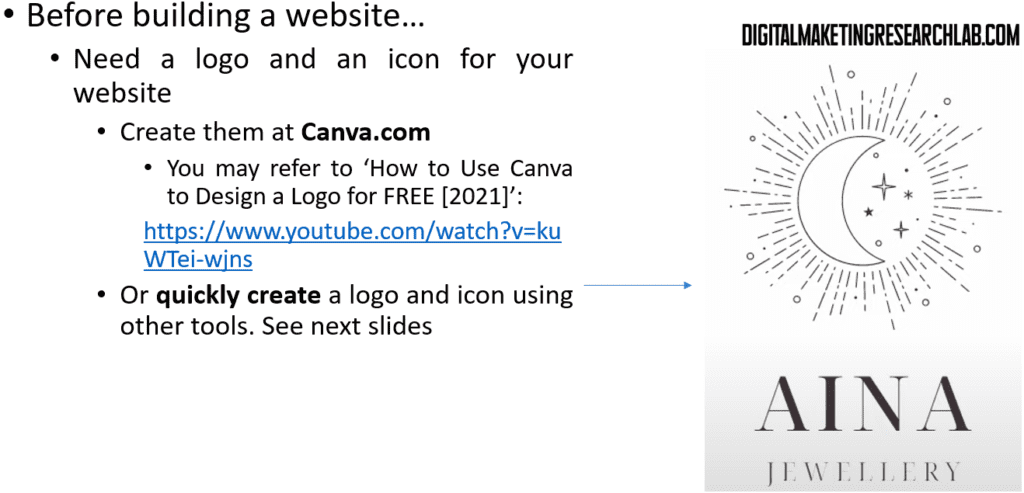
When you have your website, you definitely want to have a logo and an icon for your website. If you have no knowledge of graphic design, that is not a big issue at all. You can create them at Canva. You may refer to a video clip: ‘How to Use Canva to Design a Logo for FREE [2021]’.
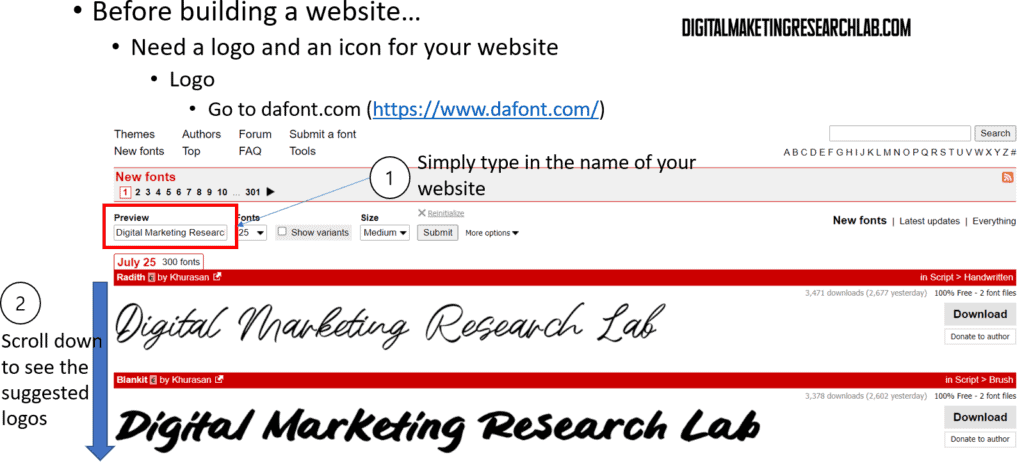
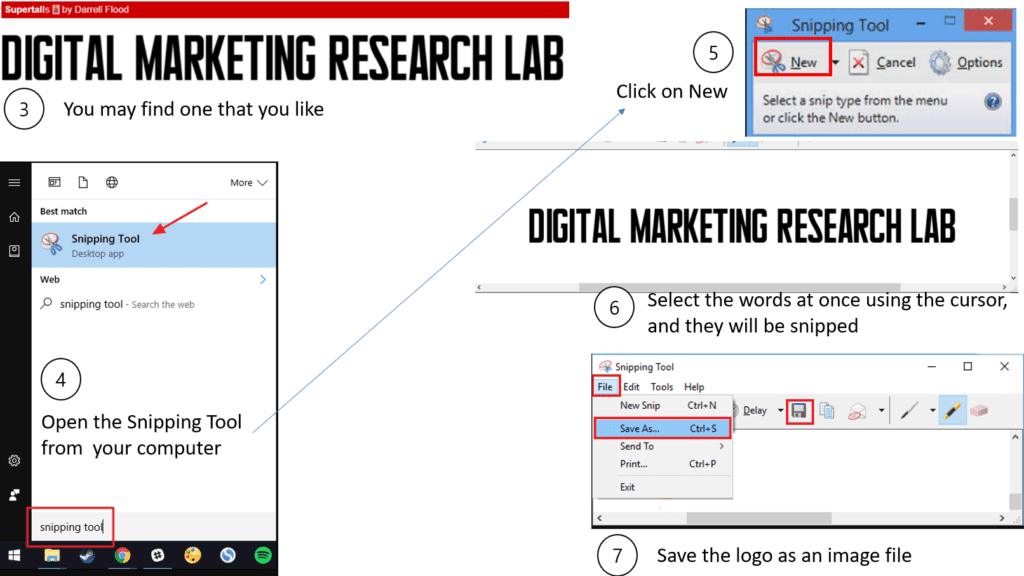
But, if you want to have a quick solution, you may refer to see the next slides. First, you can go to Dafont and follow the directions below to create a logo.
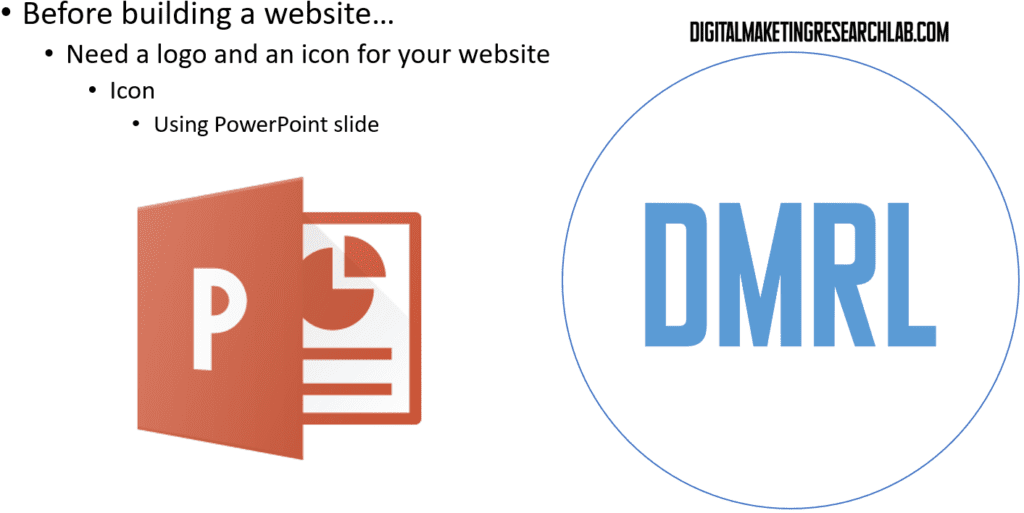
Now, let’s create a logo using PowerPoint. You can complete this job following the directions below.
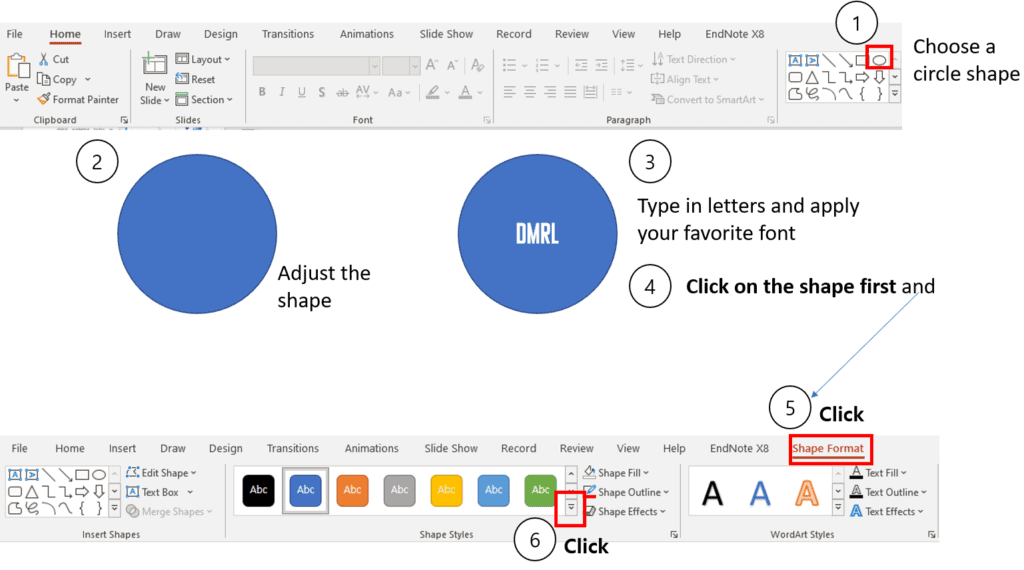
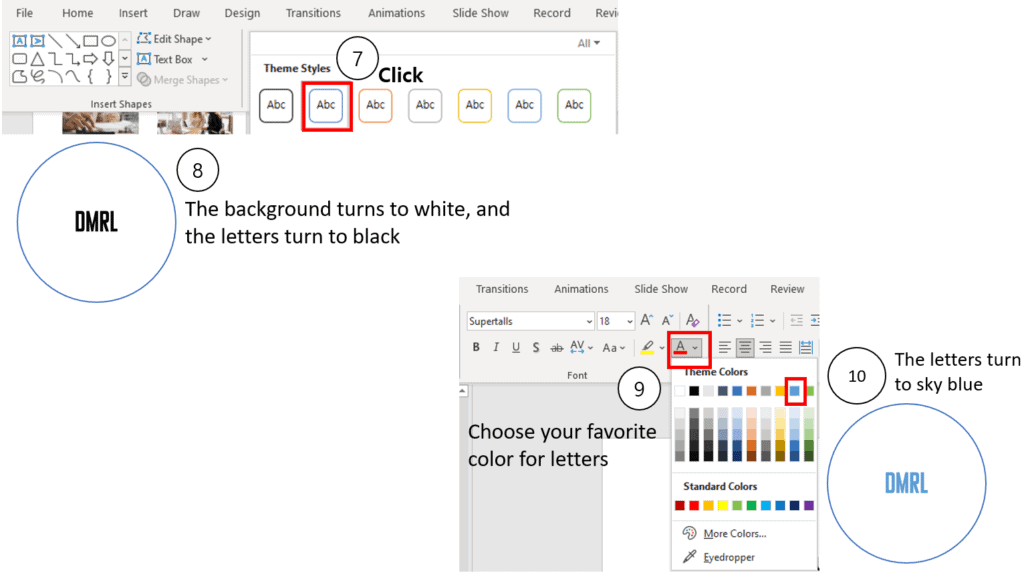
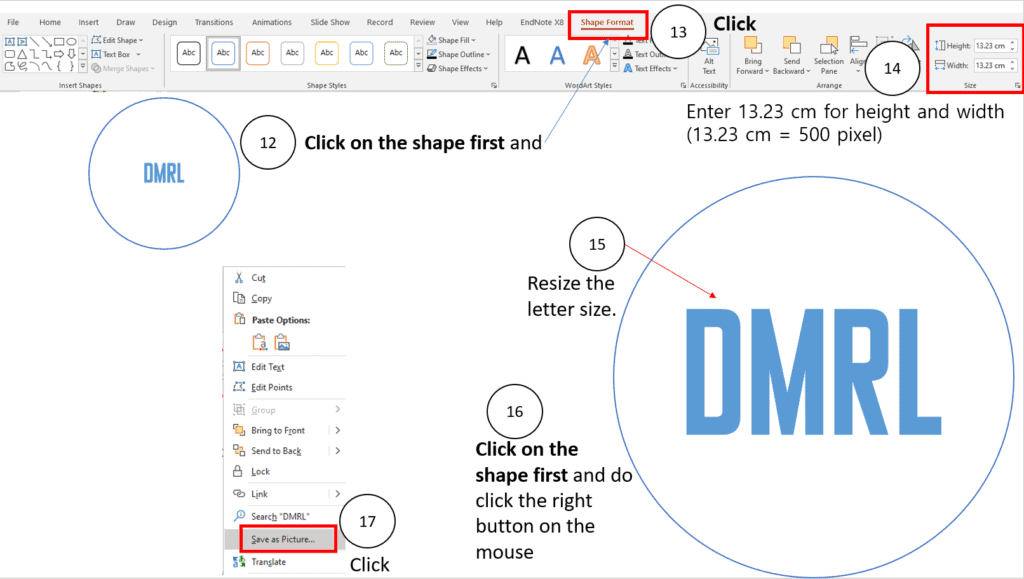
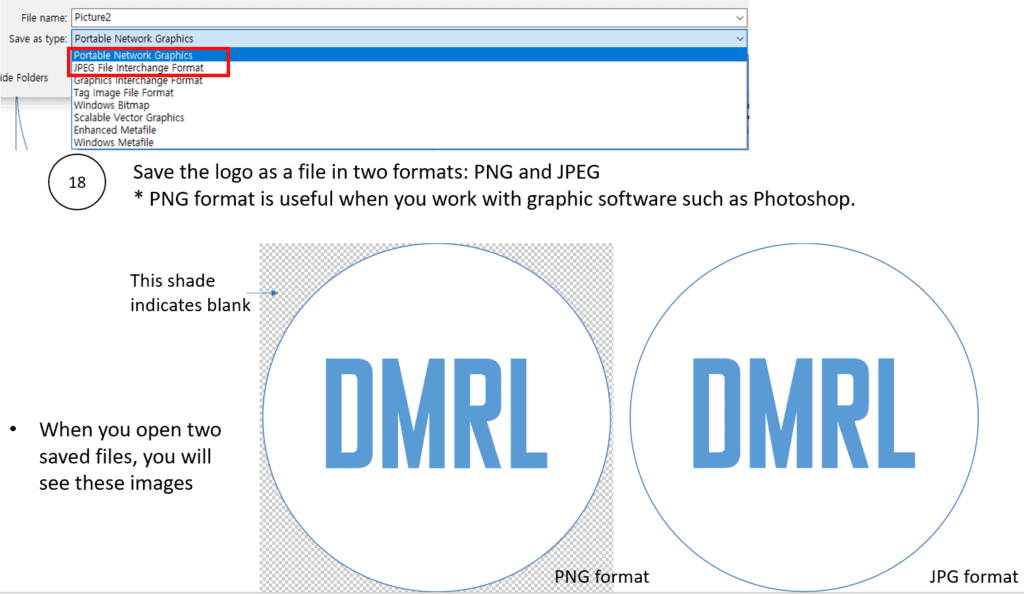
Now you have your logo and icon. But you may need relevant images and icons when you create your content. Those images will help you convey your idea to audiences efficiently. Although you may borrow images or icons from other websites by quoting the source, it would be better to use license-free images and icons.
For free images, you may try Adobe stocks, first.
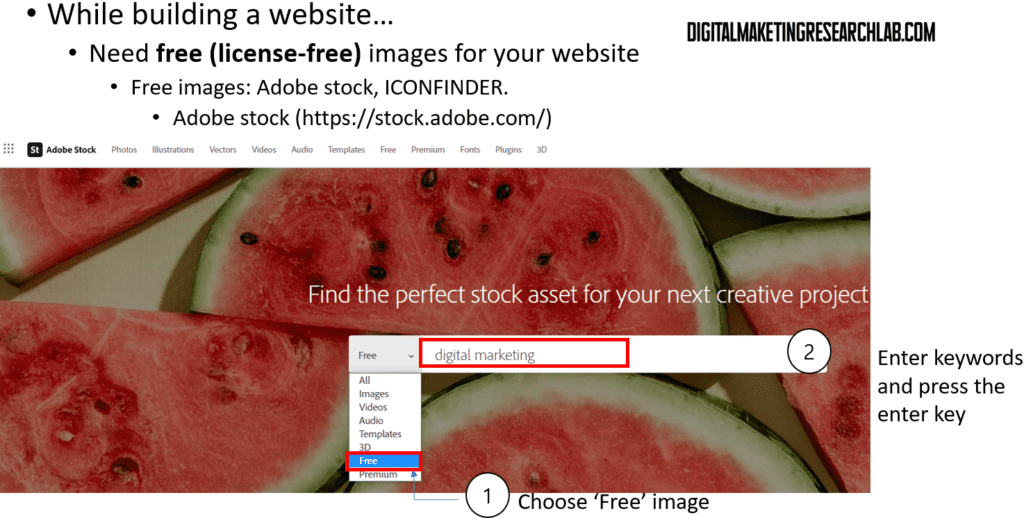
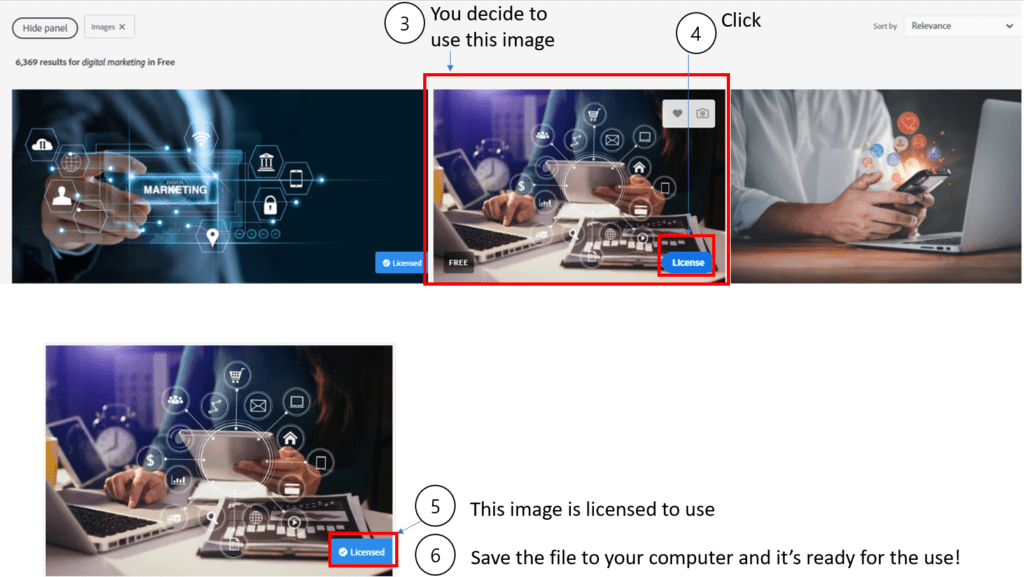
For free icons, you may try ICONFINDER, first.
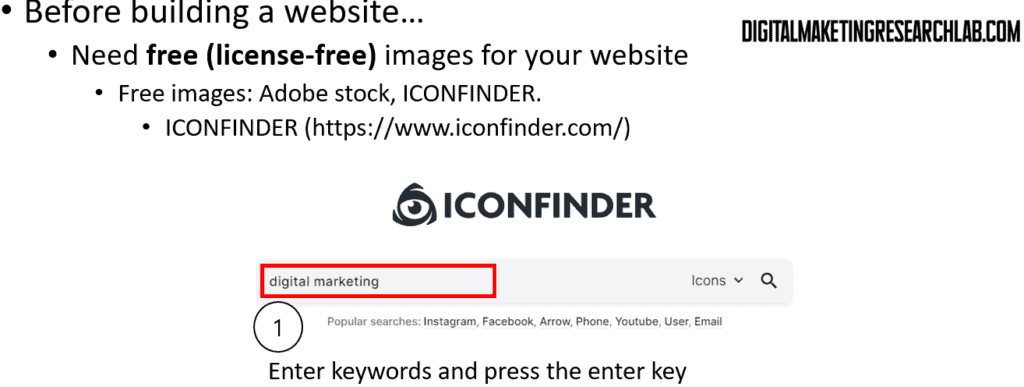
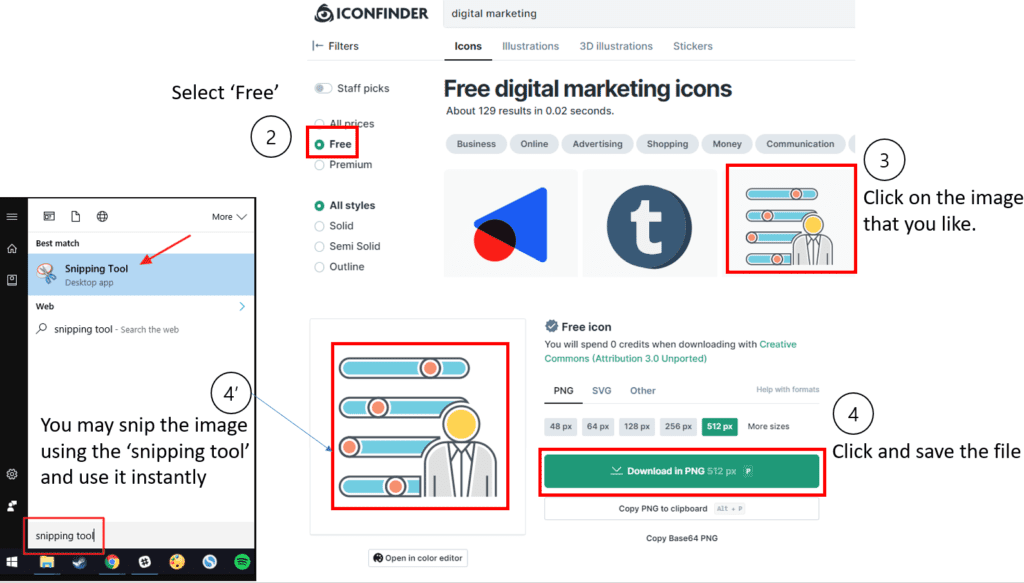
Now, you are ready to build your website. Let’s move on!
Let’s build a website!
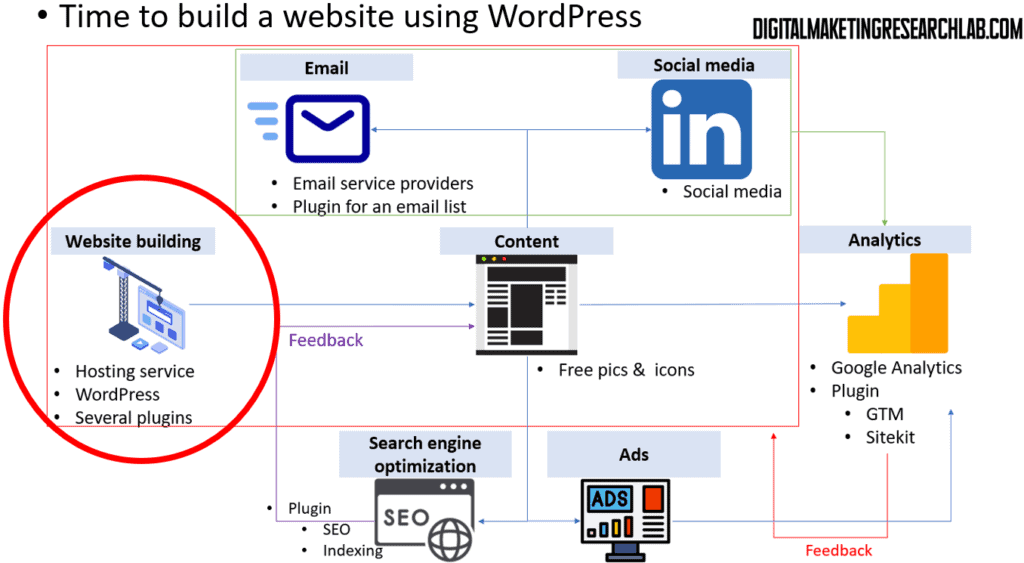
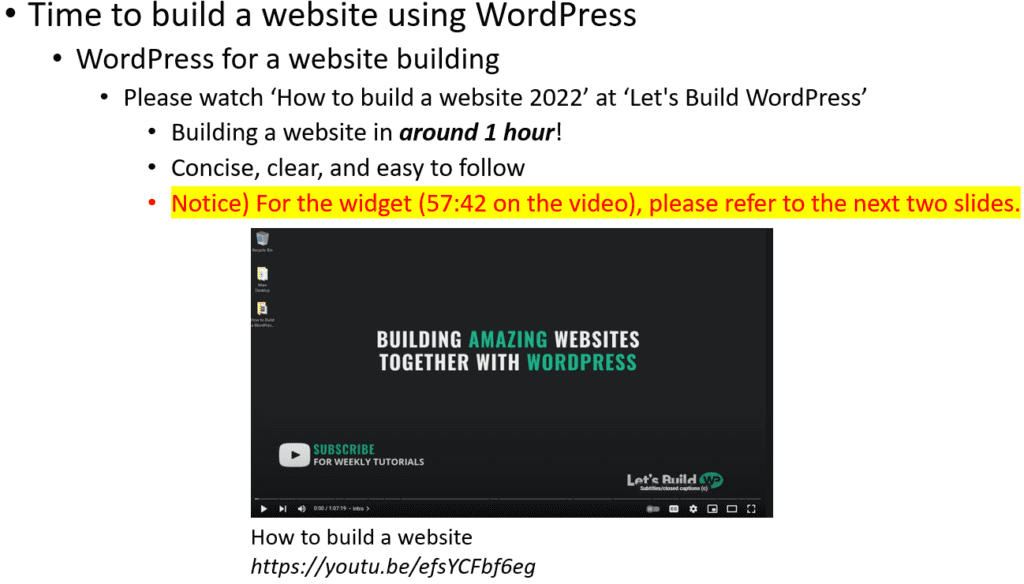
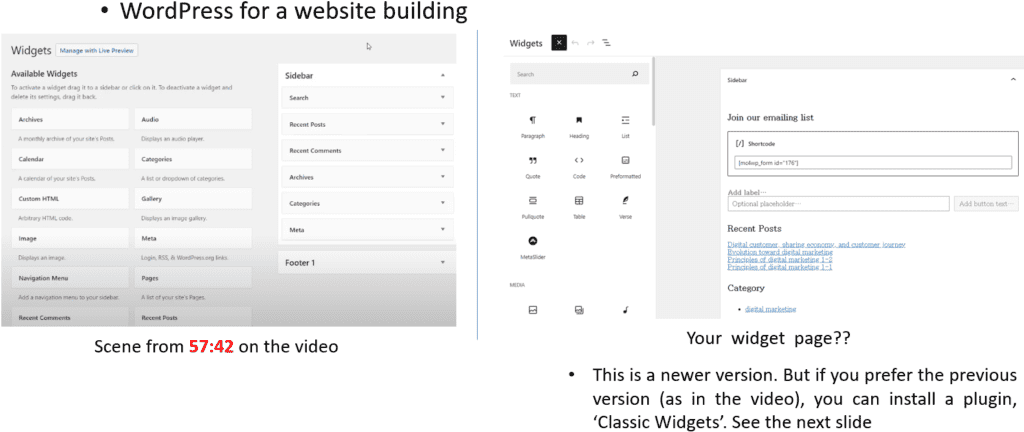
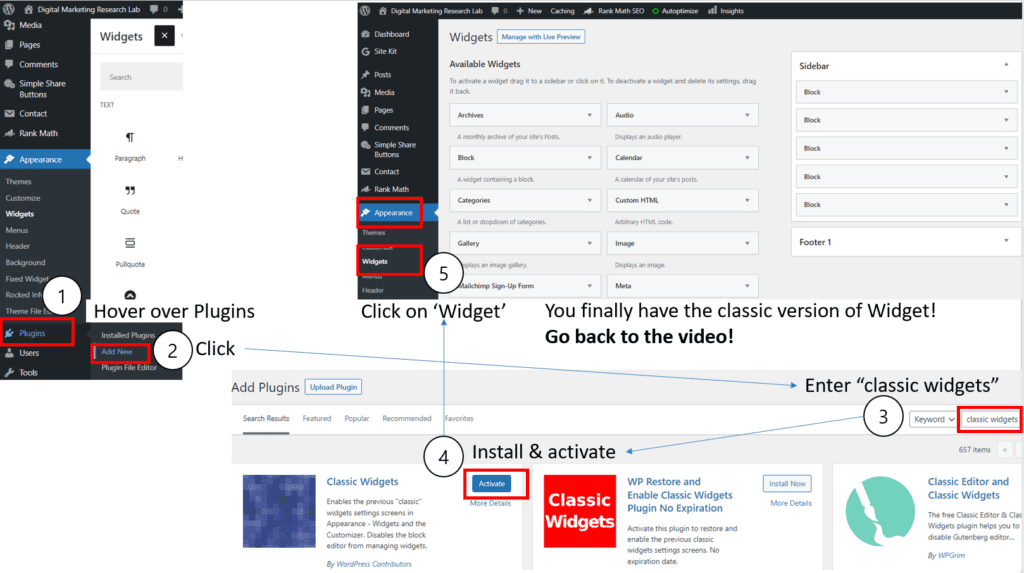
All right! Now, you are ready to build a website using WordPress. Please watch ‘How to build a website 2022’ at ‘Let’s Build WordPress’ which can help you build a website in around 1 hour! This video clip is concise, clear, and easy to follow. When you reach 57:42 on the video, you may want to make some modifications to the widgets.
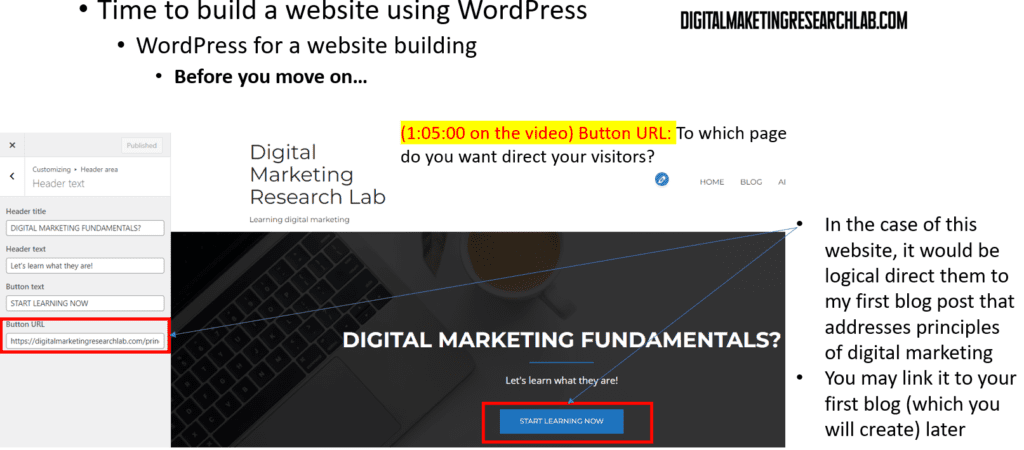
Before you keep moving on, please stop at 1:05:00 on the video and make a decision on ‘Button URL’: To which page do you want direct your visitors? In the case of this website, it would be logical direct visitors to my first blog post that addresses the principles of digital marketing. However, You may link it to your first blog (which you will create) later.
As we have a website, we hope our posts rank high in the search engine result page (SERP). Here, search engine optimization (SEO) comes into play. One of the SEO elements is the loading speed of the page so we need to install optimiation plugins. First one is Shortpixel Image Optimizer that will compress images on the website and improve its loading speed. Let’s watch the video, WordPress Image Compression Settings – ShortPixel Adaptive Images + Image Optimizer, and install Shortpixel Image Optimizer.

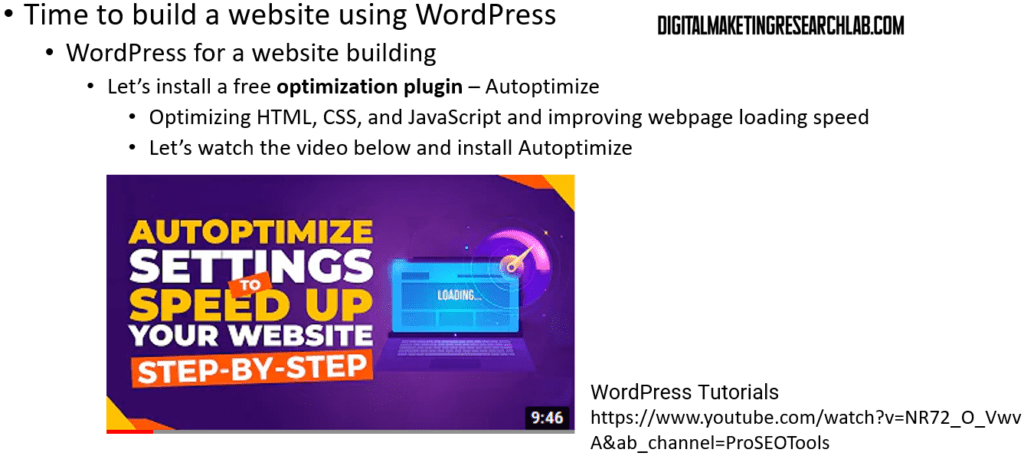
Website optimization includes optimization of HTML, CSS, and Javascript as well as image optimization. However, it will be too much for digital marketing beginners to acquire knowledge about them. But, you don’t need to worry about it. There are also useful WordPress plugins that will make this job easy. We will install two plugins – Autoptimize and Async JavaScript. First, let’s install Autoptimize first referring to Autoptimize Plugin Setup Tutorial 2022.
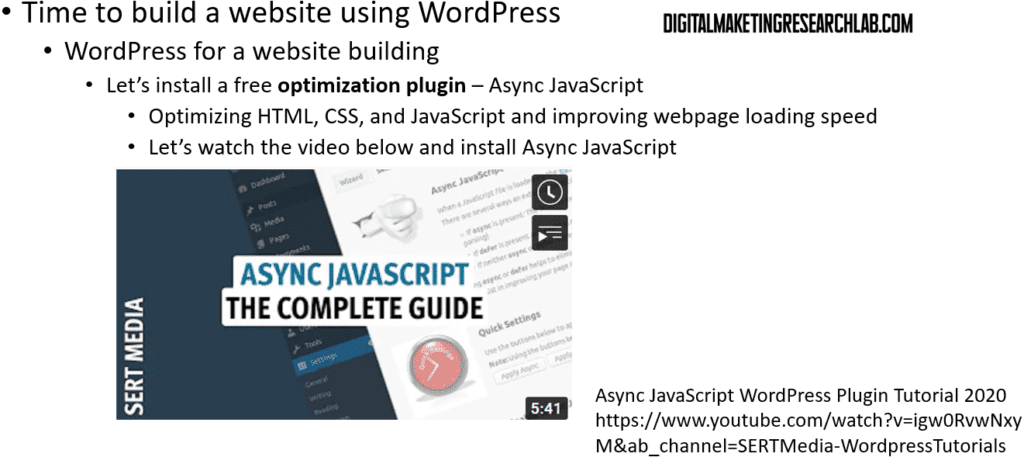
Next, it’s time to install Async JavaScrip. Autoptimize and Async JavaScript both are created by the same author, Franky Goossens. So, it seems like both plugins work nicely in combination though sometimes it ‘may’ cause some issues. Then let’s install Autoptimize first referring to “Async JavaScript WordPress Plugin Tutorial 2020”
You can meausure the speed of a webpage at PageSpeed Insight.
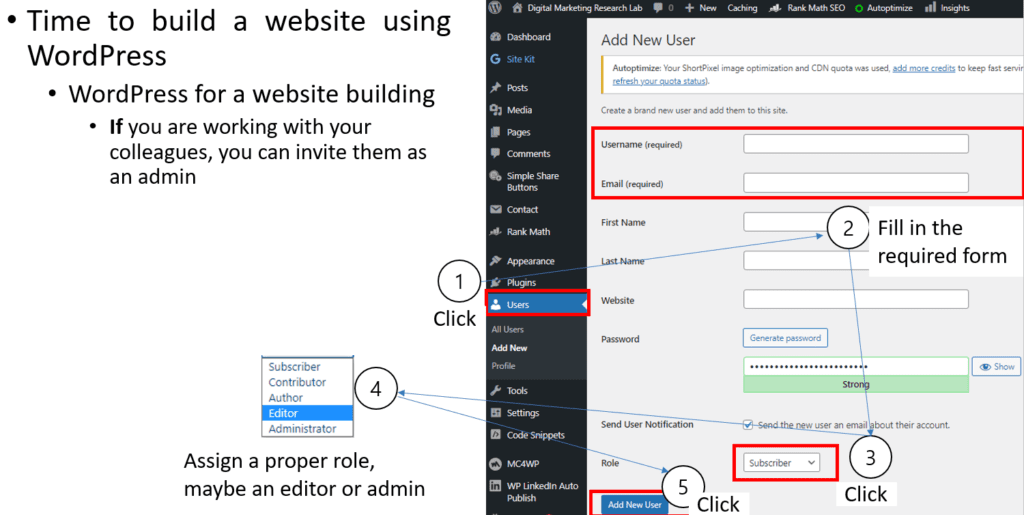
Now you are almost there. If you are working with your colleagues, you can invite them as an admin.
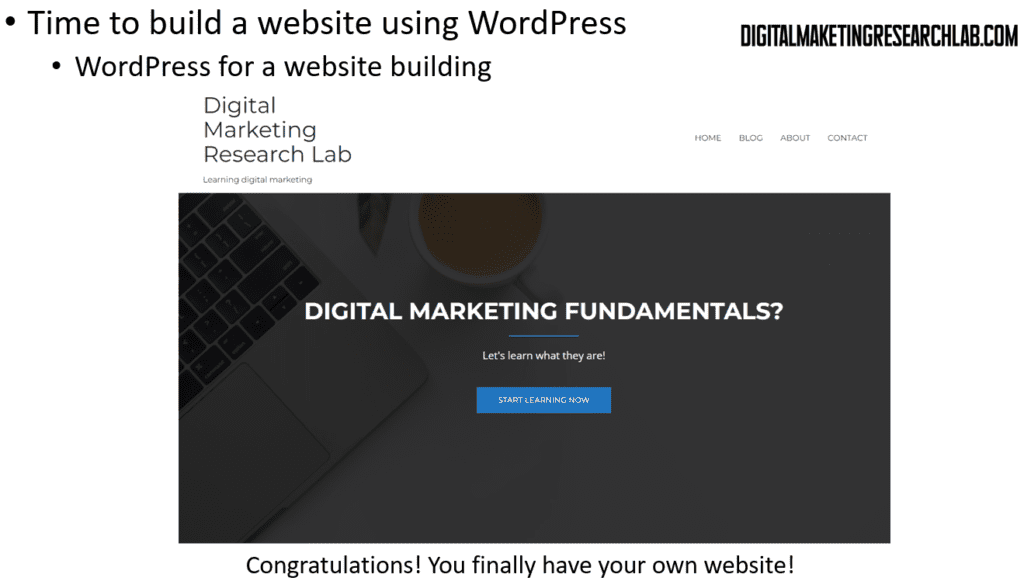
Congratulations! You finally have your own website!
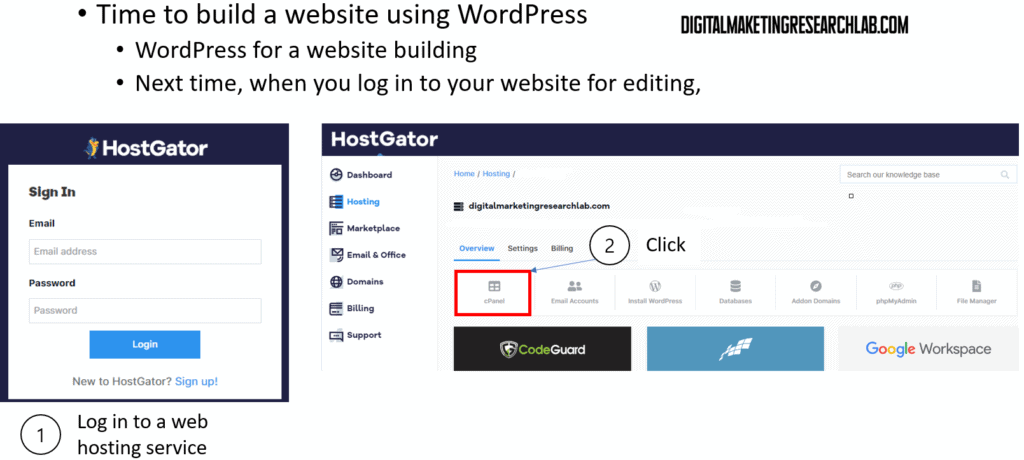
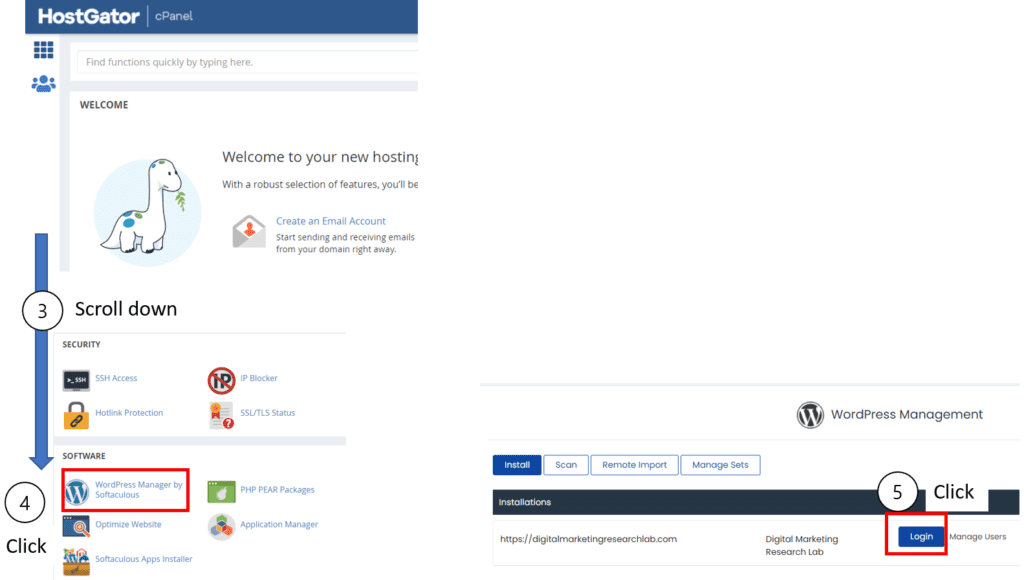
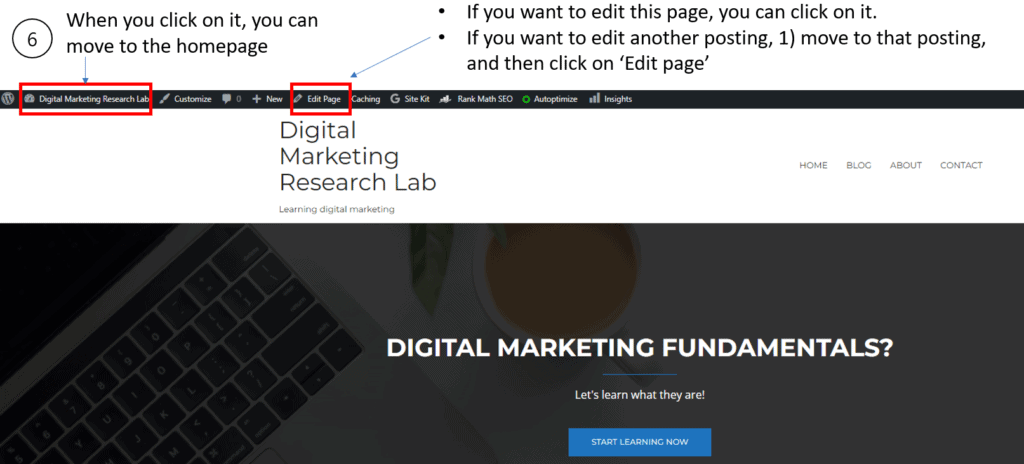
Next time, when you log in to your website for editing, you can follow the procedure.
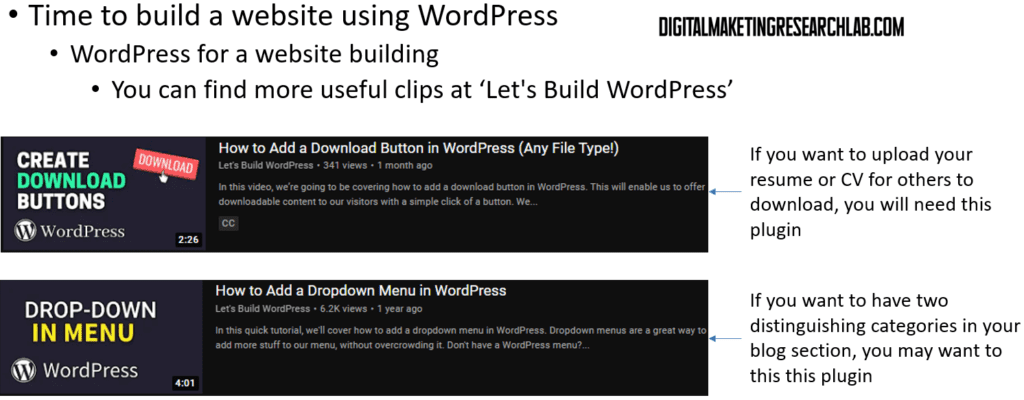
You can find more useful clips at ‘Let’s Build WordPress’
Next time, you will connect your website with vairous digital marketing tools!
