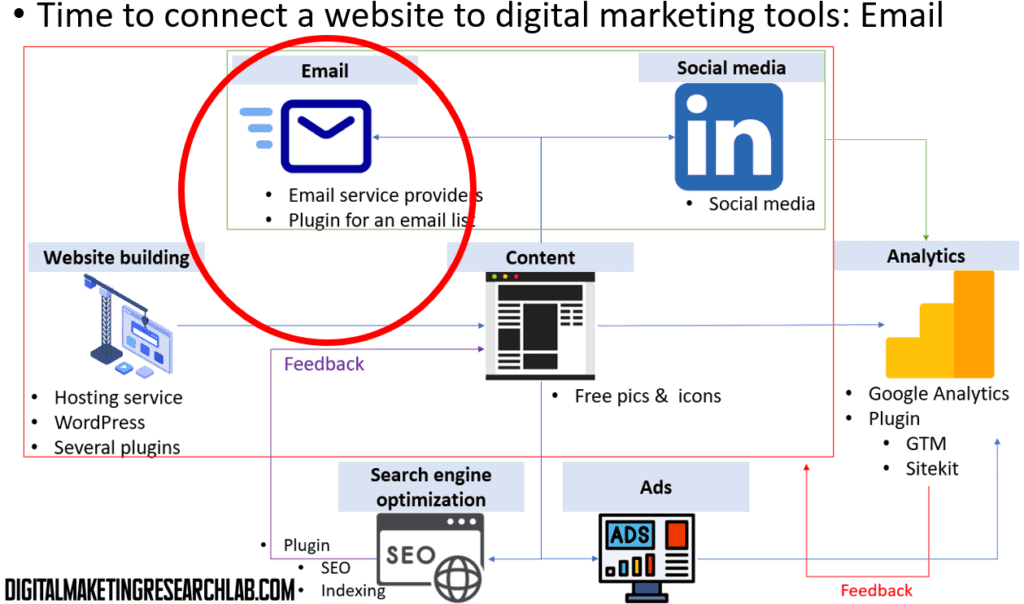
Connecting with Email for automation
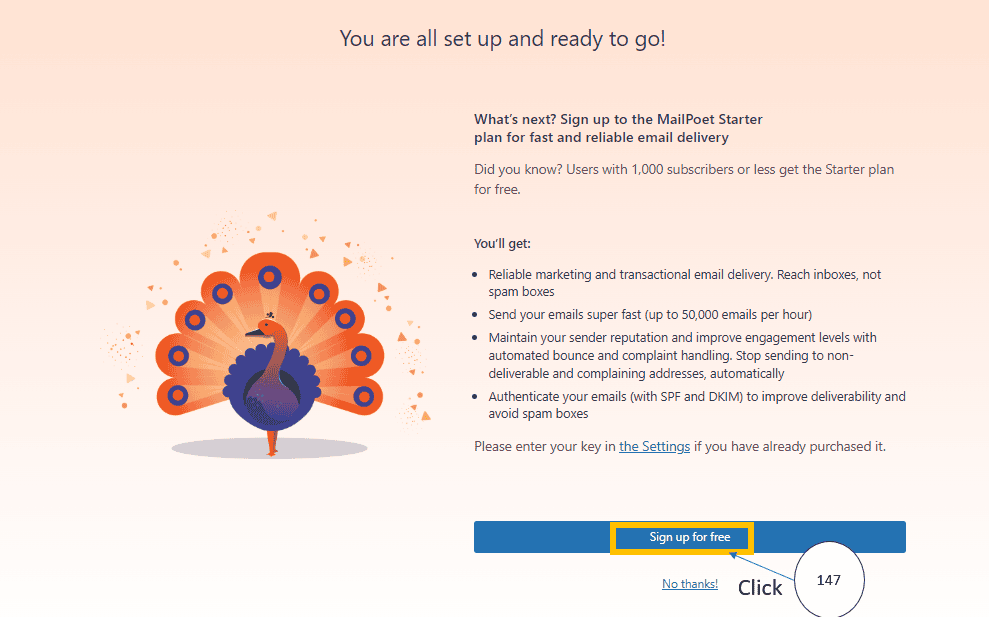
Now, it’s time to connect the web with an email tool for automation. Here, we will try a free version of MailPoet because it allows users to utilize three key features: emailing, automation, and analytics.
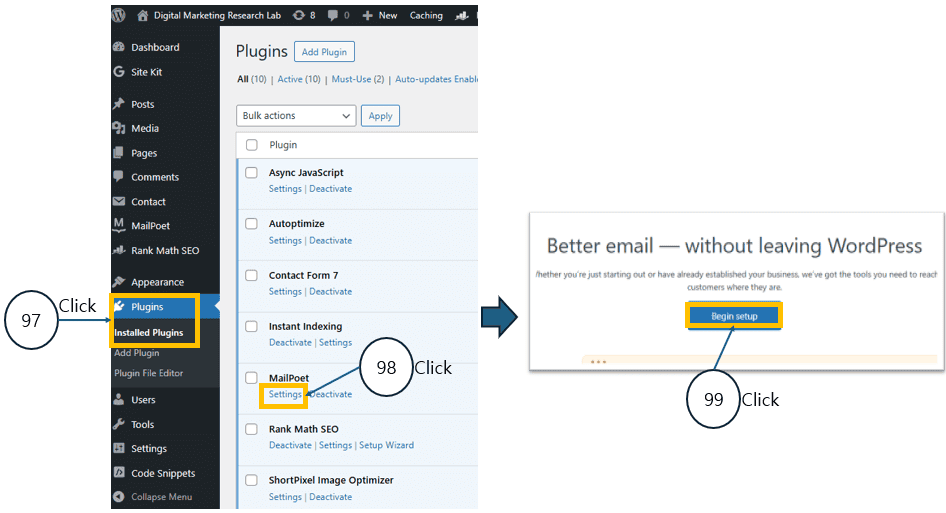
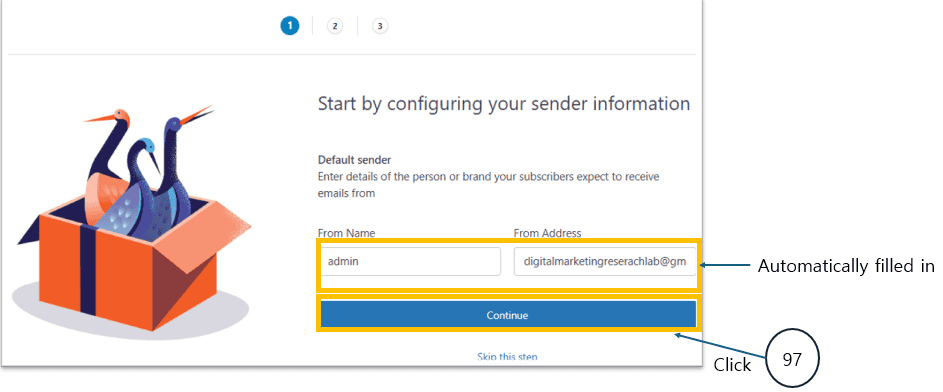
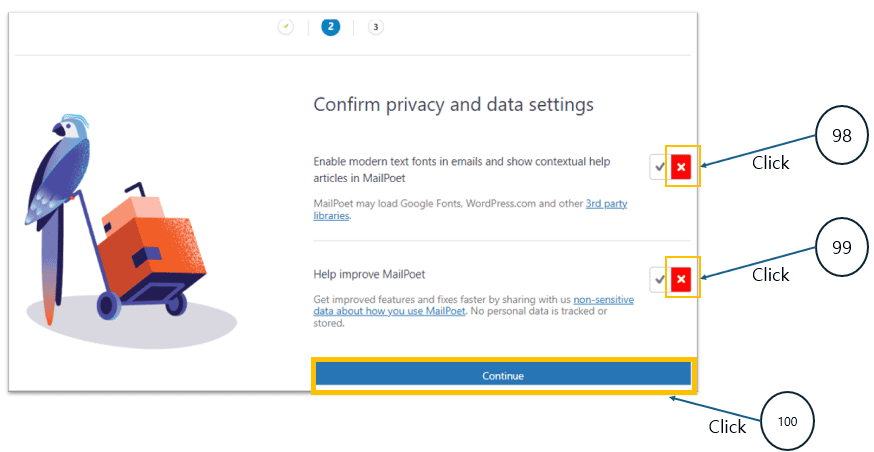
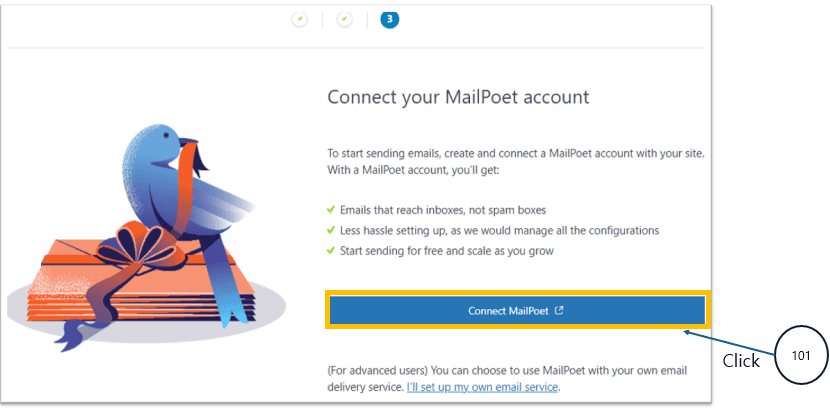
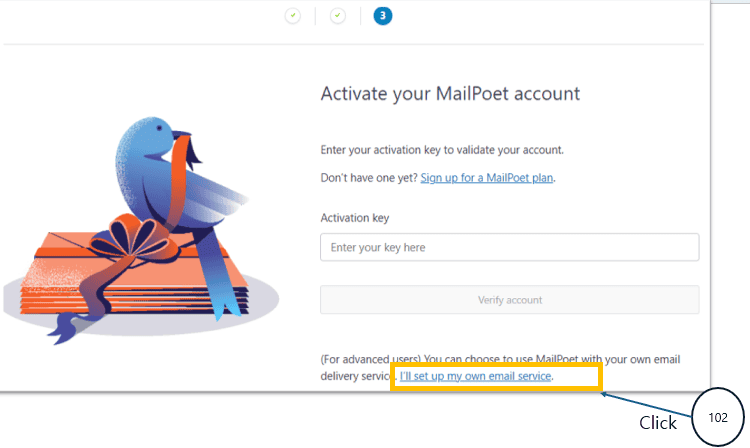
Let’s work on the initial MailPoet setup wizard while declining MailPoet’s official email sending service and instead configuring your website to use your own SMTP server for email delivery — an advanced setup option.
As a result of this setup: MailPoet becomes fully ready for use, and a system is created that allows your website to send emails directly through your own server.

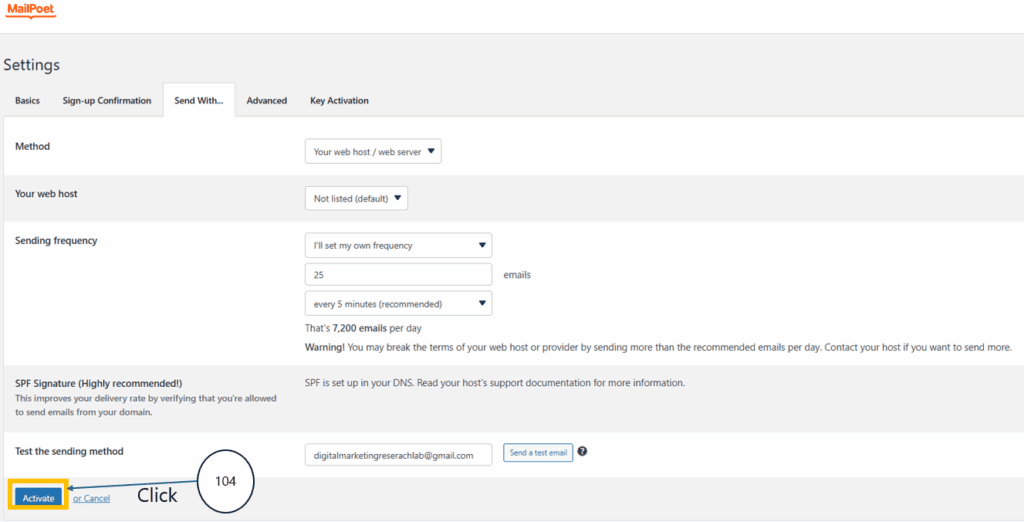
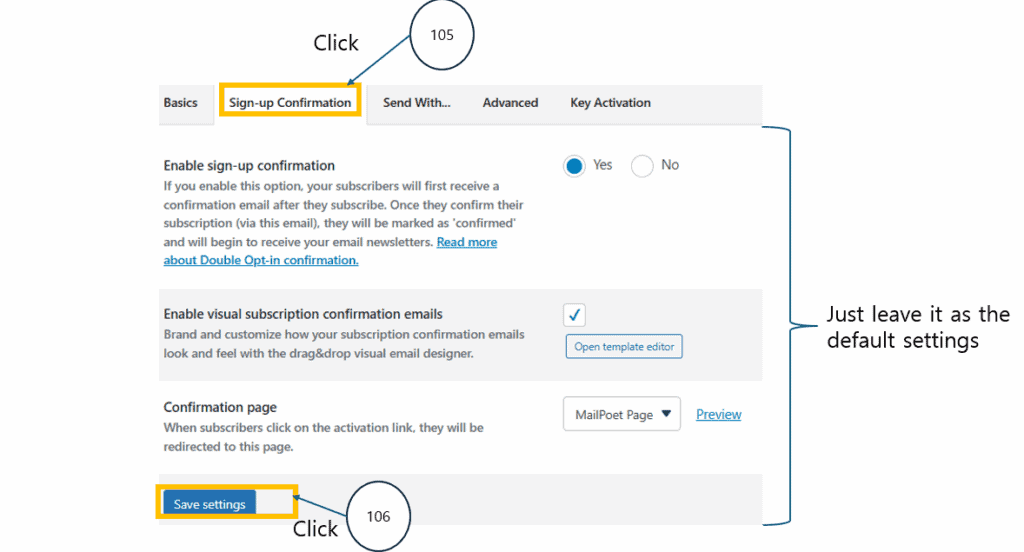
The next process below activates and tests the SMTP-based sending method,
and applies the default subscription confirmation settings to bring MailPoet into a fully operational state for real email delivery.
In other words, it is the final setup step that enables the MailPoet newsletter sending feature to function properly on your site.
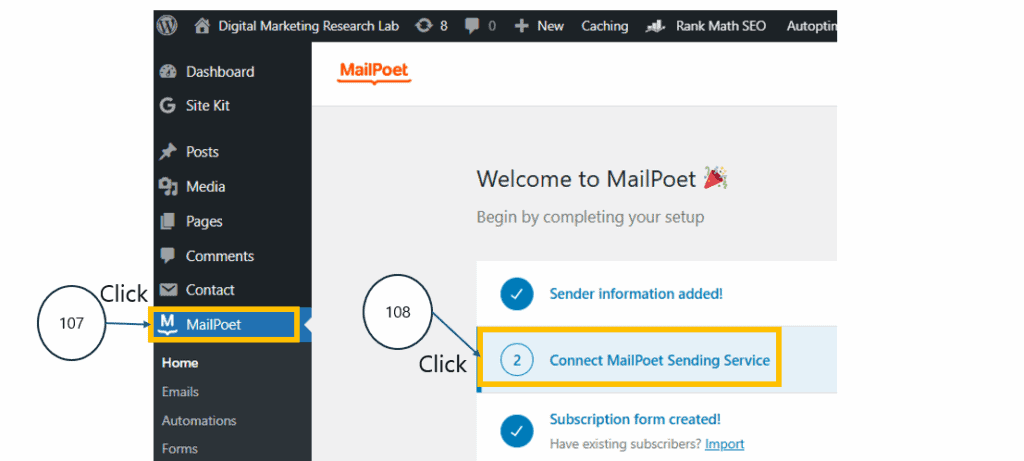
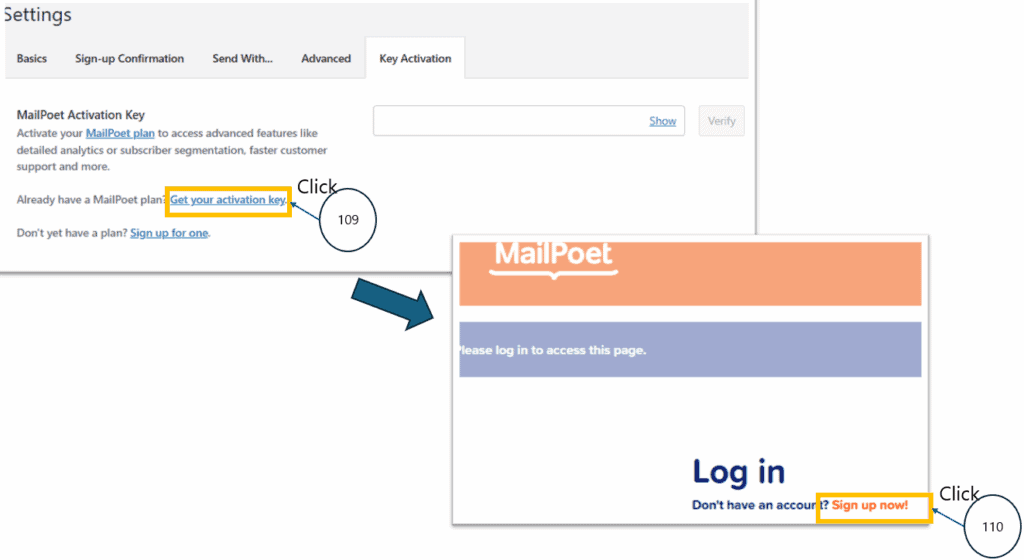
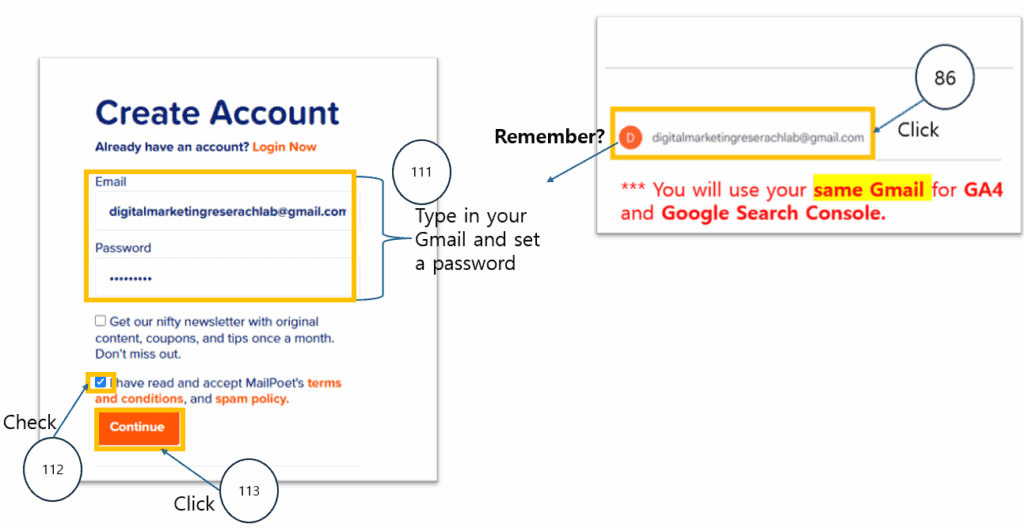
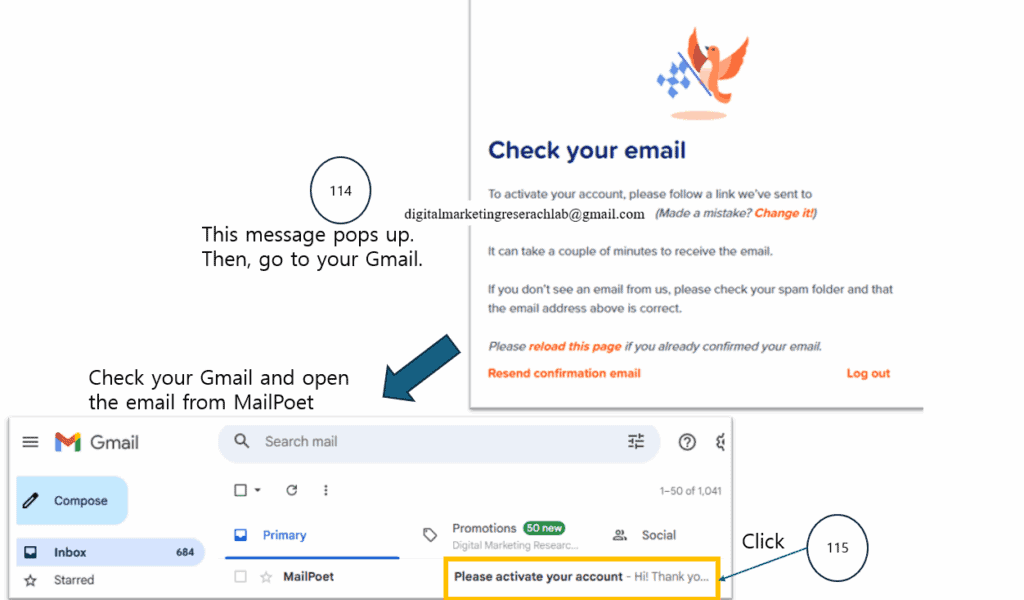
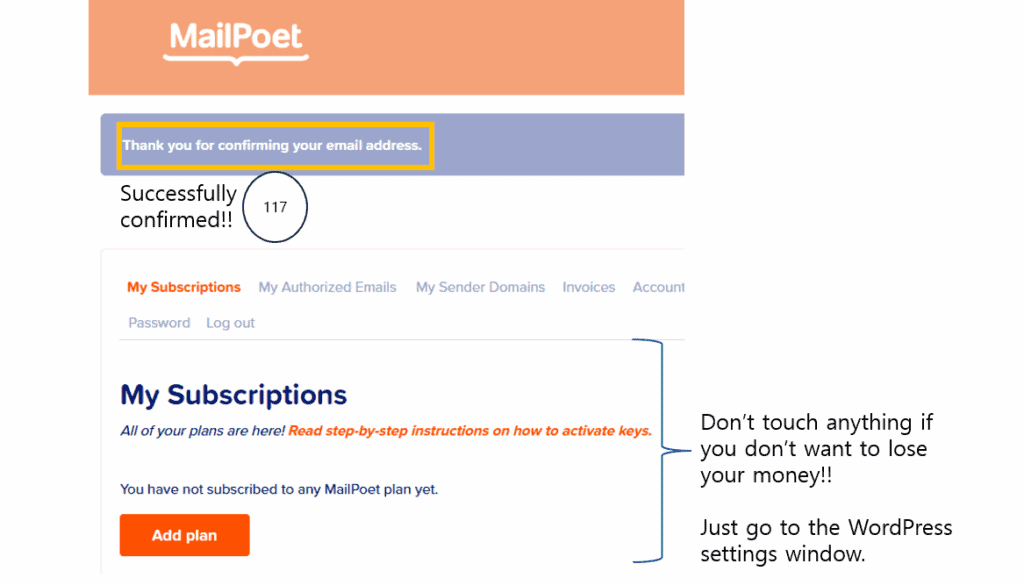
The next process below creates a MailPoet account and verifies it by email so that the MailPoet plugin can be fully activated and enabled to send emails.
It is a required step that puts the newsletter feature on your site into a fully functional, ready-to-send state.
Never forget to use the same Gmail address that you have used for your domain.


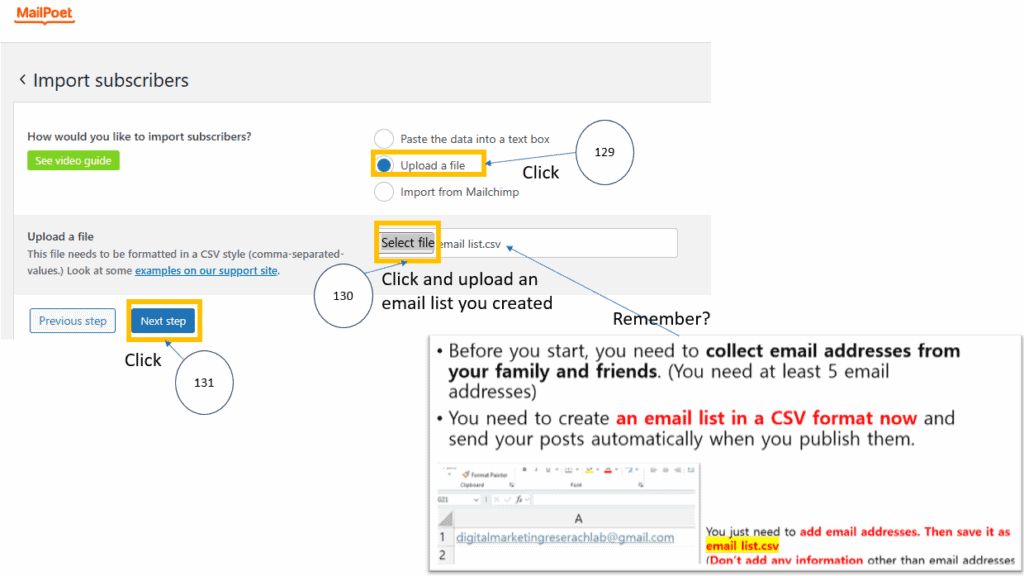
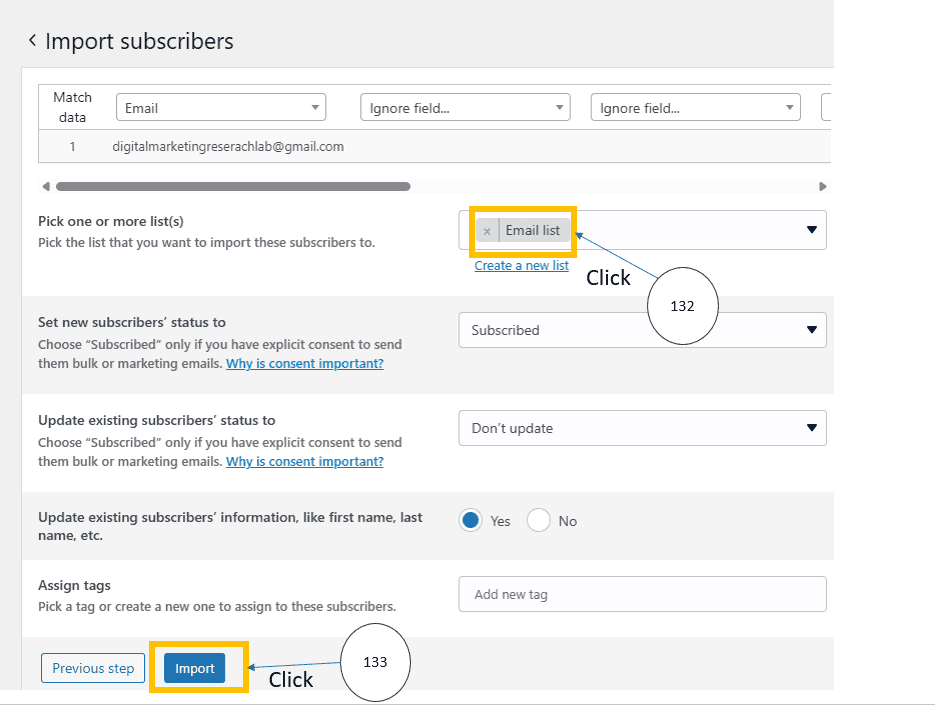
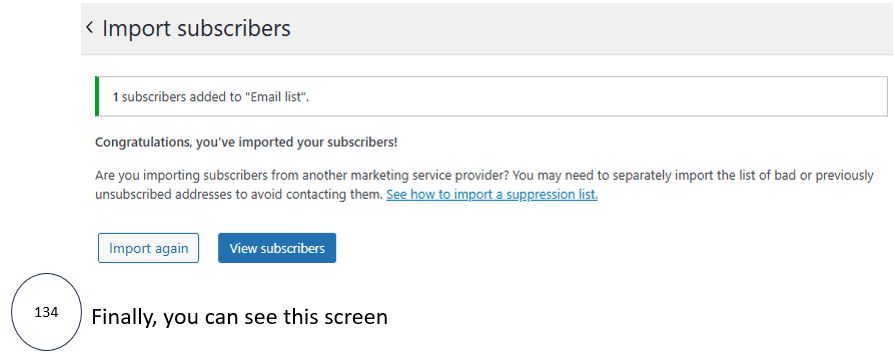
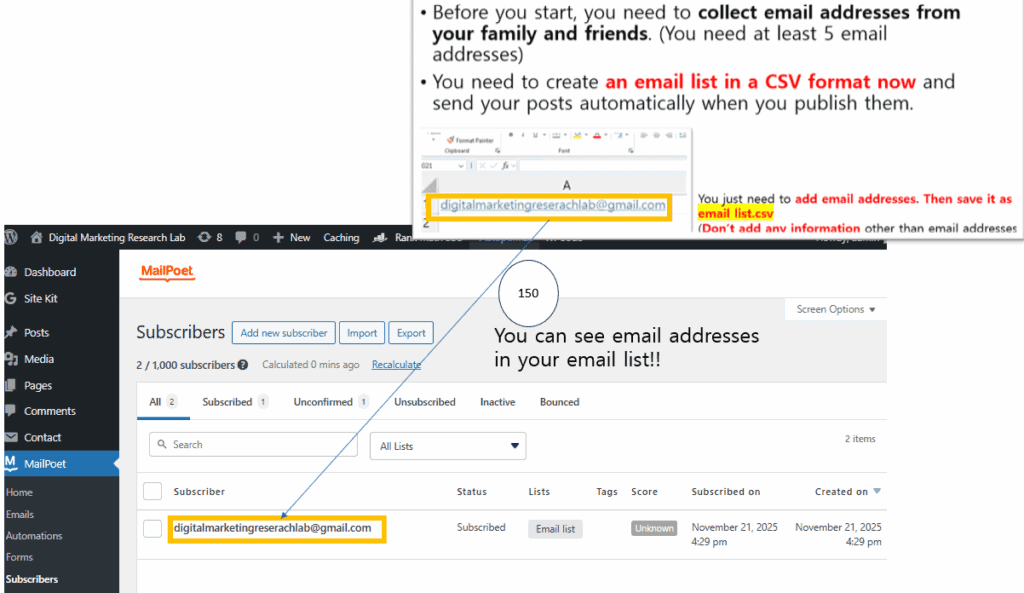
The process below creates a subscriber list in MailPoet and imports email addresses from a CSV file so you can send emails. As a result, your website gains a real newsletter subscriber database, and MailPoet’s sending function becomes fully activated.
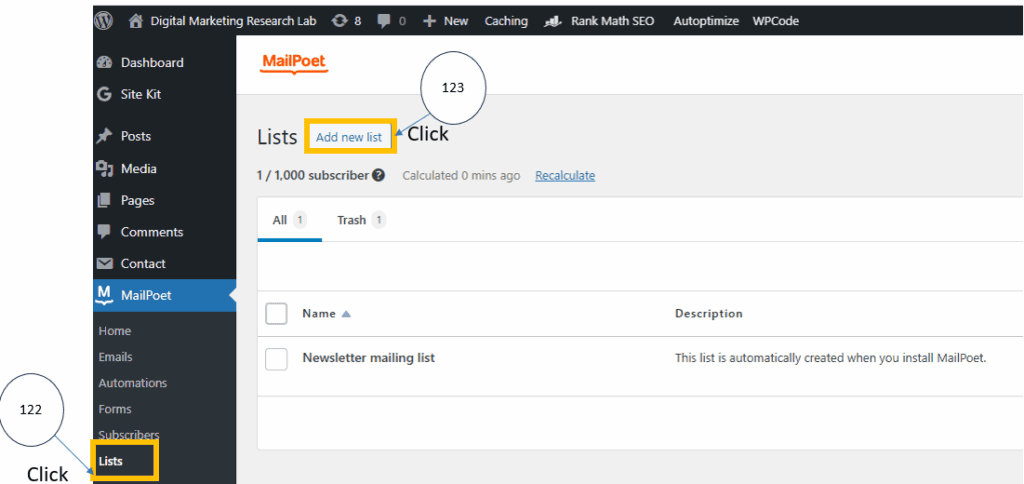
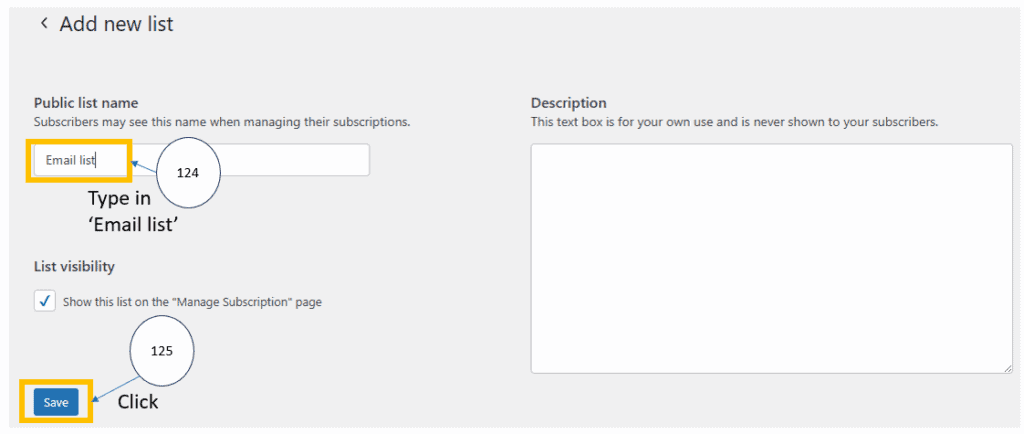

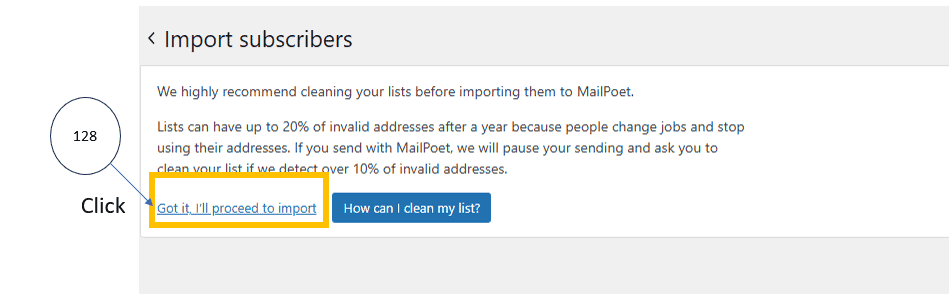
Now it’s time to upload the email list you created for this step!
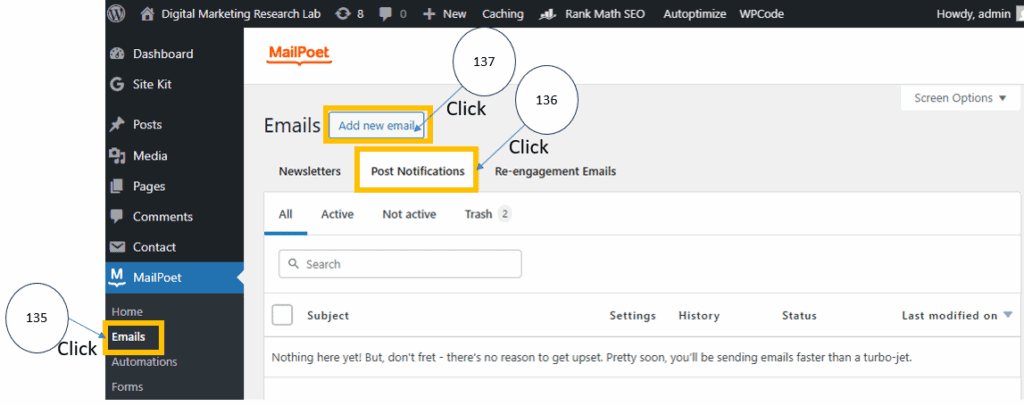
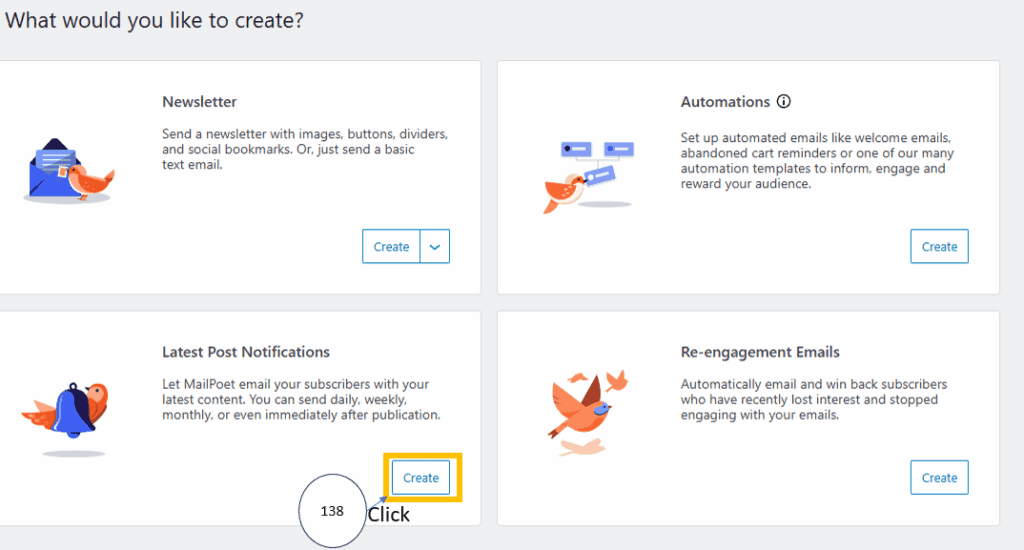
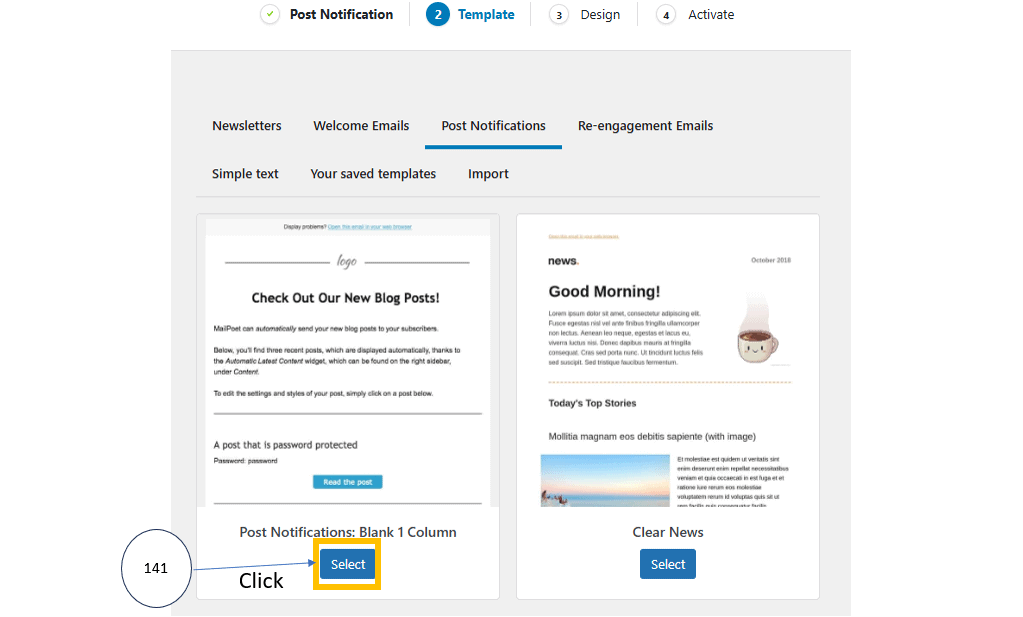
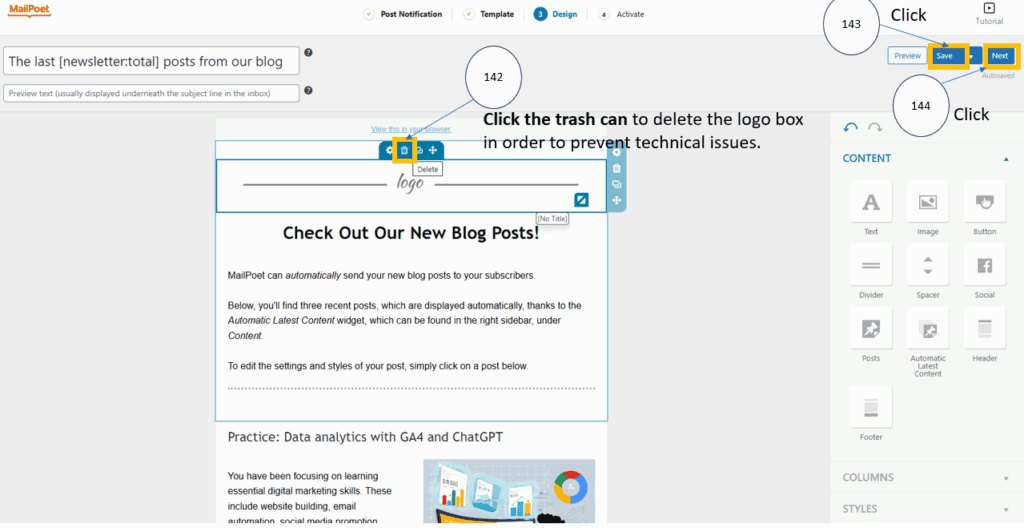
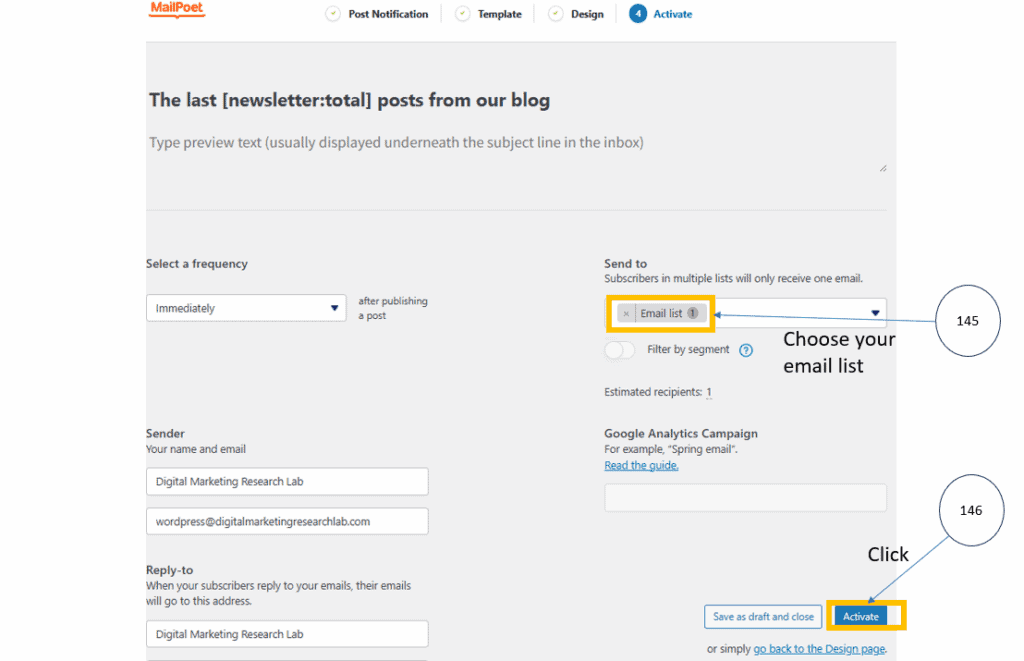
The final process below sets up and activates MailPoet’s automatic post notification system, so that whenever you publish a blog post, it is automatically emailed to your subscribers. As a result, your website gains a fully functioning newsletter system where every new post triggers an immediate automatic email delivery.
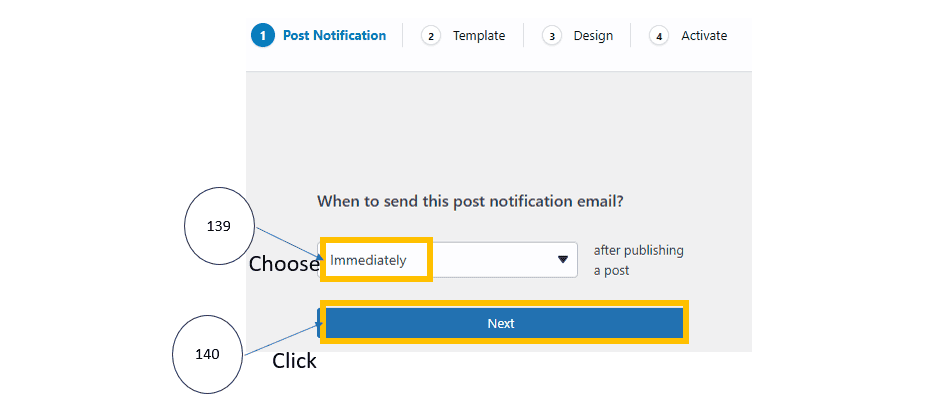

You made it! Congratulations! From now on, whenever you upload a new post, an automatic notification email will be sent immediately to everyone on your email list.
By the way, are you curious about what will happen if you publish a post? Let’s take a look at what happens after you publish a post. If you have just uploaded a new blog post, follow the steps below to see how the email notification works.
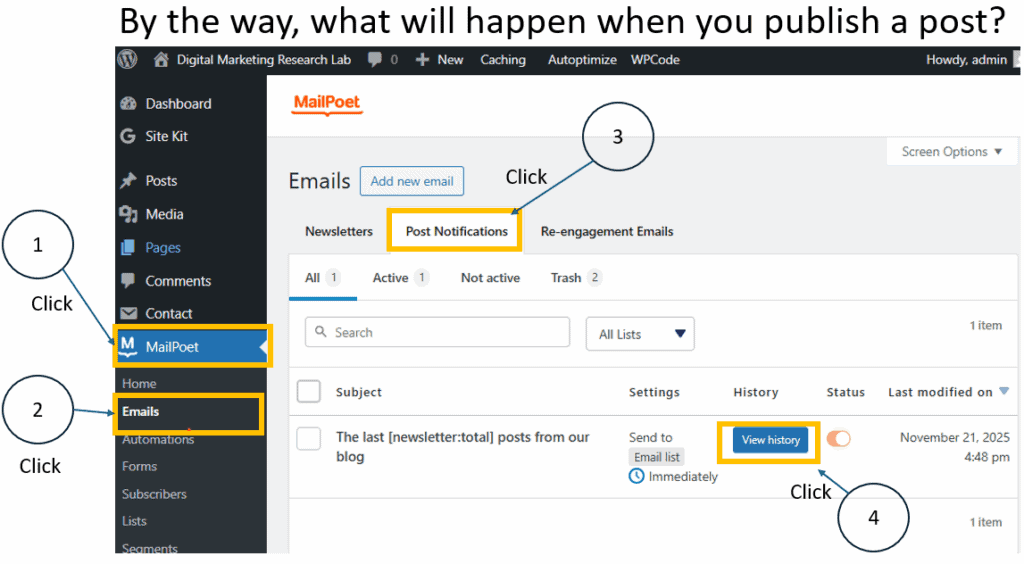
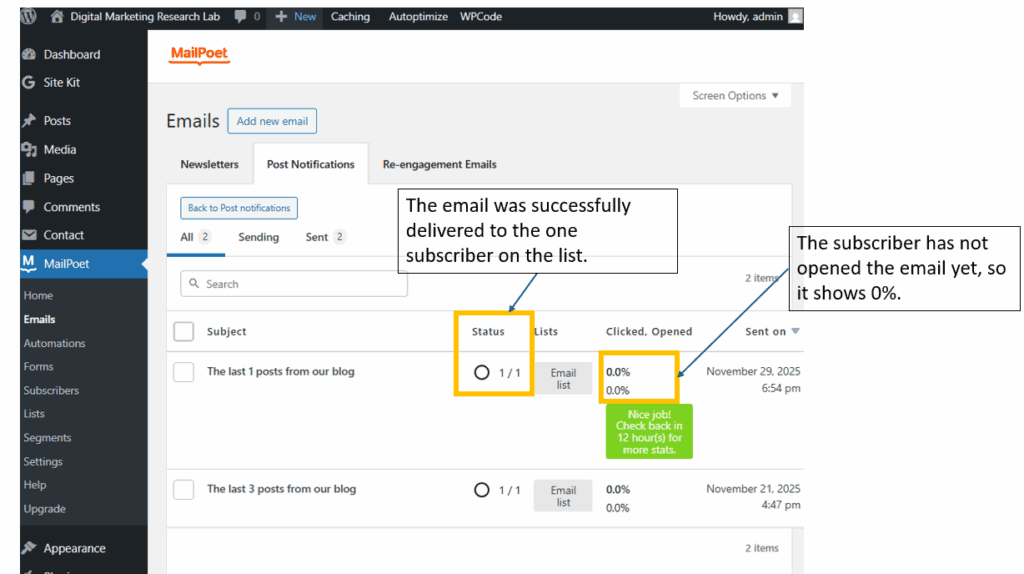
After you publish a post, MailPoet automatically sends a Post Notification email to everyone on your email list. On this screen, you can check whether the email was delivered successfully. If the subscriber has not opened the email yet, the “Opened” rate will remain at 0%. MailPoet usually updates the analytics every few hours, so the numbers may not change immediately.
Here you can see that the email actually arrived in the subscriber’s inbox. When the subscriber clicks the email, the “Opened” rate changes from 0% to 100%. Since this example only has one subscriber, a single open results in a 100% open rate.
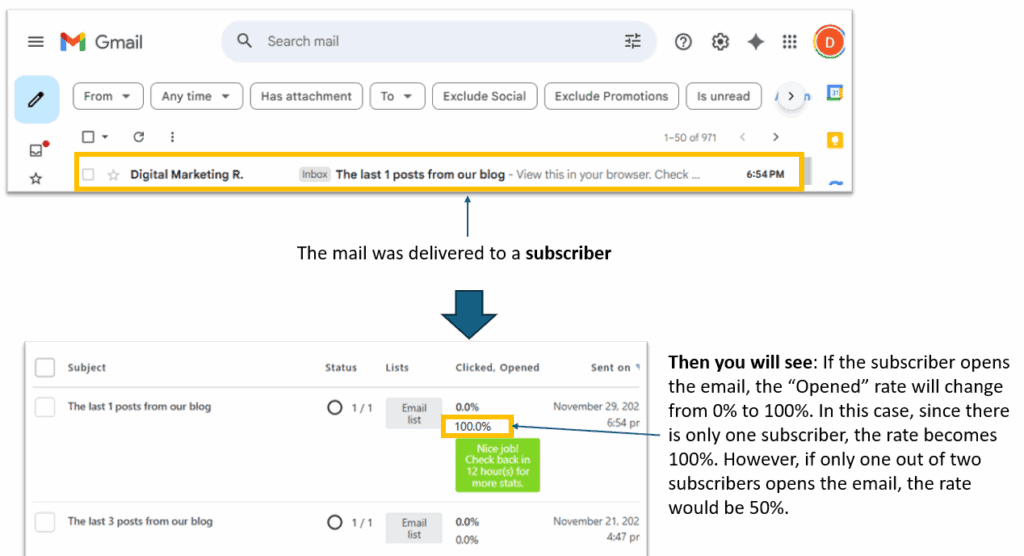
If the subscriber opens the email and clicks the “Read the post” button, the “Clicked” rate also changes. With only one subscriber, one click becomes 100%. Please click the 100% number on the MailPoet screen to see the detailed analytics.

After clicking the number, you will see detailed information about delivery, opens, clicks, unsubscribes, and bounces. This page confirms that the email was sent to one subscriber, successfully delivered, opened, and clicked without any errors.
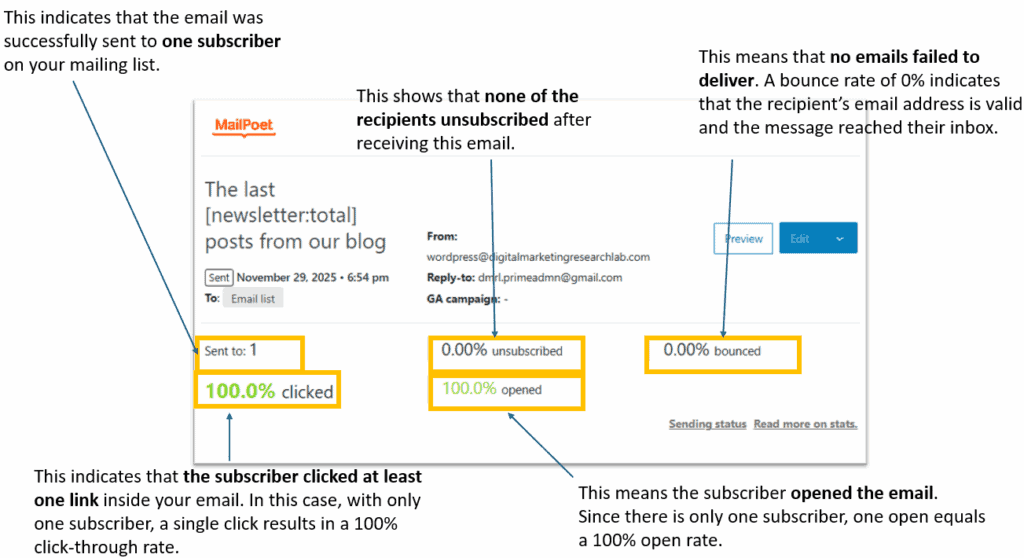
After you publish a new post, make sure to check these MailPoet reports to confirm that your email notification system is working correctly.
Connecting with social media (LinkedIn)
Let’s start the website with one of the social media platforms, LinkedIn. As the potential audiences are HR managers or marketing managers, LinkedIn is the best social media tool.

Since you already created a personal LinkedIn account last time, you will now create a LinkedIn organizational account. However, we will not link LinkedIn directly to your website. This is because the content posted on LinkedIn will be adapted versions of the content on your website, and therefore, website posts should not be automatically published on LinkedIn.
For creating your LinkedIn organizational account, please refer to the video (https://youtu.be/VeAd3Nbea1w below. This video was uploaded in February 2025 and uses the latest LinkedIn interface and menu layout, making it the easiest to follow. It also provides free banner and logo design templates, which beginners often struggle with, so you can apply them immediately.
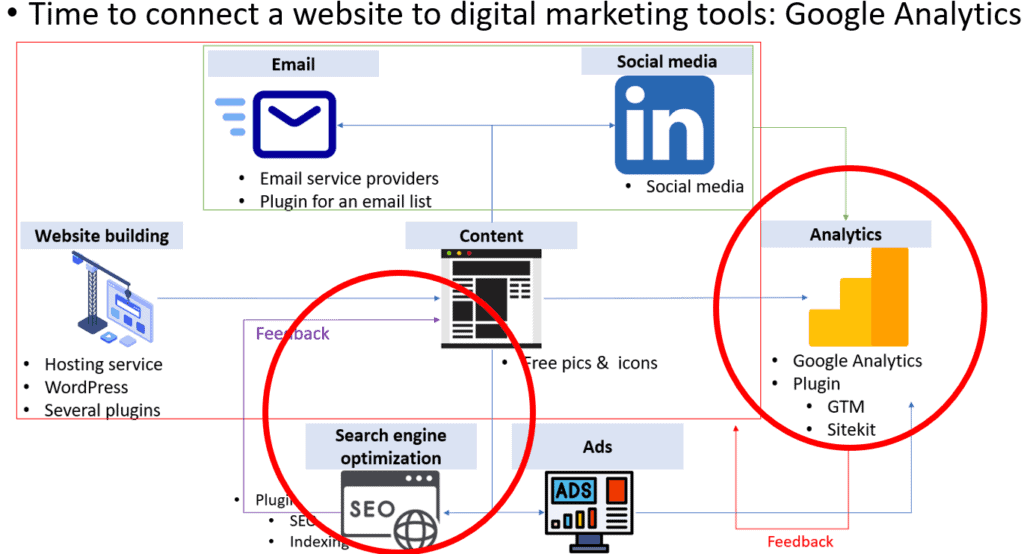
Next time we will connect the web with Google Analytics and Search Engine Optimization tool.